Floor Plans
Overview
The Floor Plans page is where floor plans and maps are uploaded and managed. These are used as the background canvas in the Layouts page, where devices are placed on top of them for visual control and monitoring.
The page uses the same split-panel layout as other sections: the floor plan list is on the left and a preview of the selected floor plan is shown on the right.
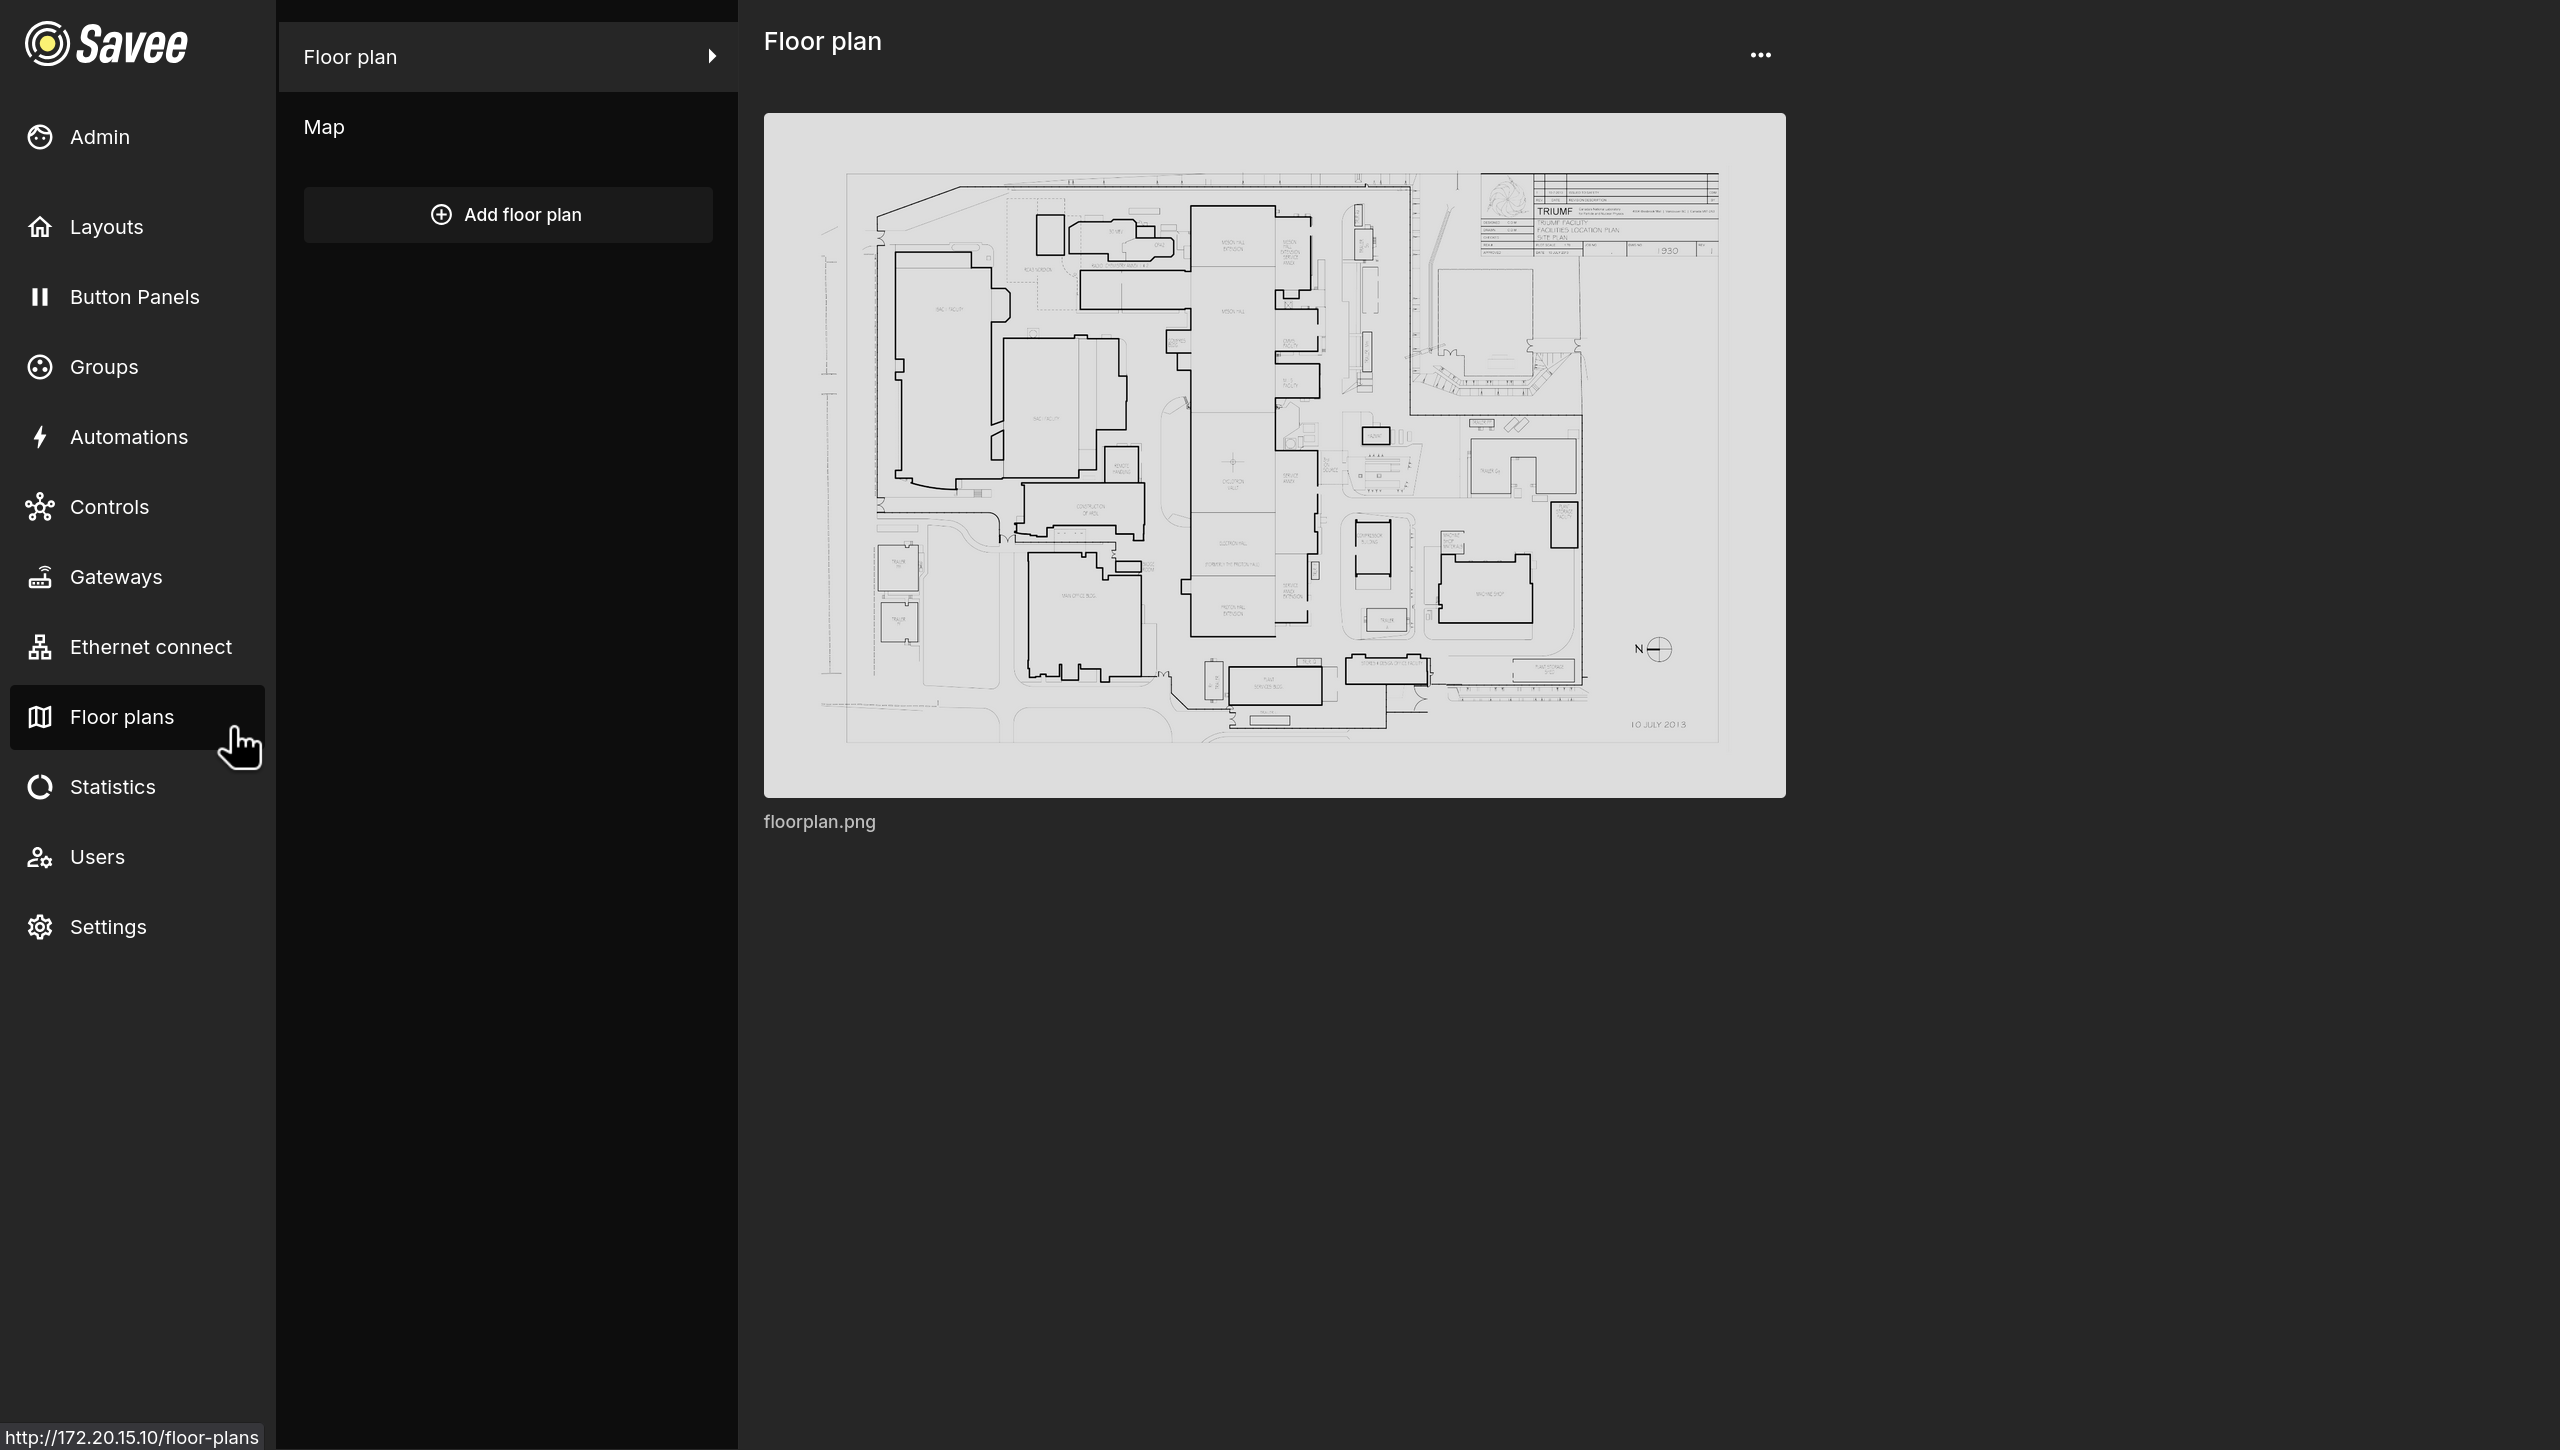
Click a floor plan in the list to preview it on the right. Use the ⋯ menu in the top-right of the detail view to edit or delete it. To add a new floor plan, click + Add floor plan at the bottom of the list.
Adding a Floor Plan
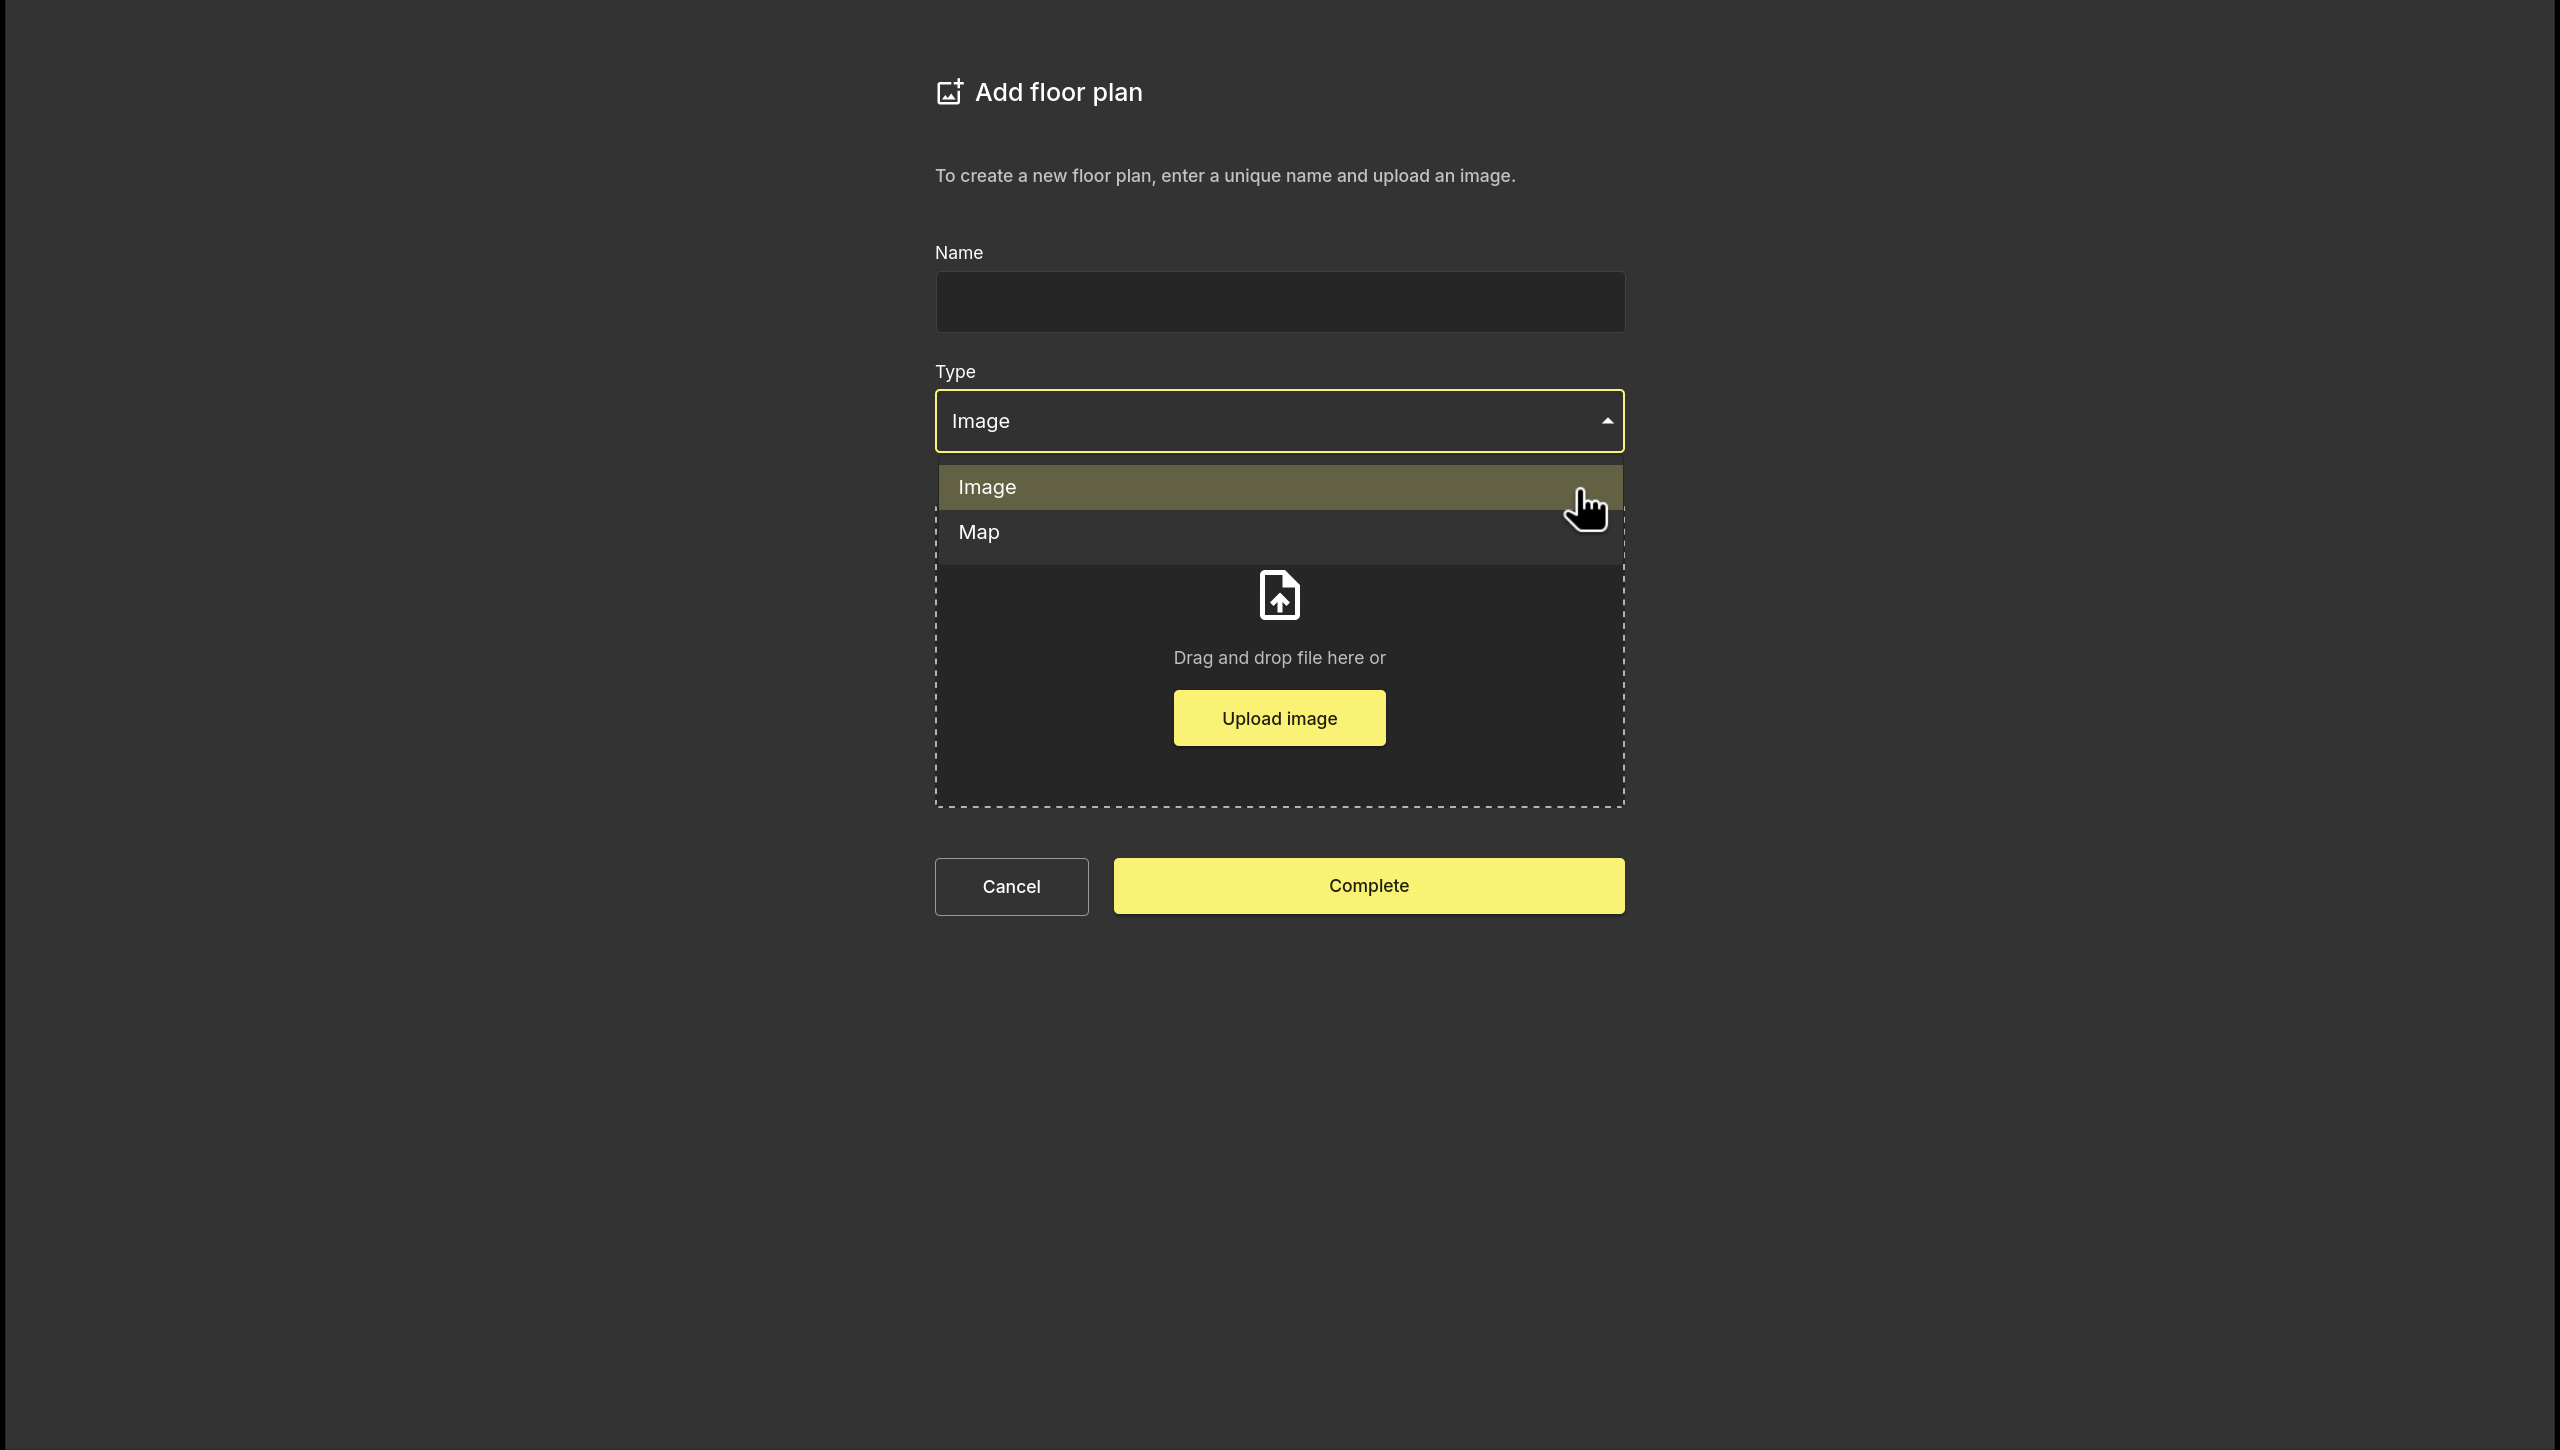
Clicking + Add floor plan opens the Add floor plan dialog.
| Field | Description |
|---|---|
| Name | A unique name to identify the floor plan in the list and in the Layouts selector. |
| Type | The type of background to use — Image or Map. |
Type: Image
Upload a custom floor plan image by dragging and dropping a file onto the upload area or clicking Upload image. Supported formats are .png and .jpg.
Type: Map
Uses an interactive geographic map (OpenStreetMap) as the background instead of an uploaded image. No file upload is required.
Click Complete to save the floor plan.
Managing Floor Plans
The ⋯ menu in the detail view provides the following options:
| Option | Description |
|---|---|
| Edit | Rename the floor plan or replace the uploaded image with a new one. |
| Delete | Permanently removes the floor plan. This action cannot be undone and will also remove any devices placed on it in the Layouts page. |