Automations
Overview
Automations allow you to automatically control device groups based on time schedules and predefined rules. Once created, the user can assign the automations to one or more groups from the Groups page.
The page uses the same split-panel layout as Groups: the automation list is on the left and the detail view is on the right.
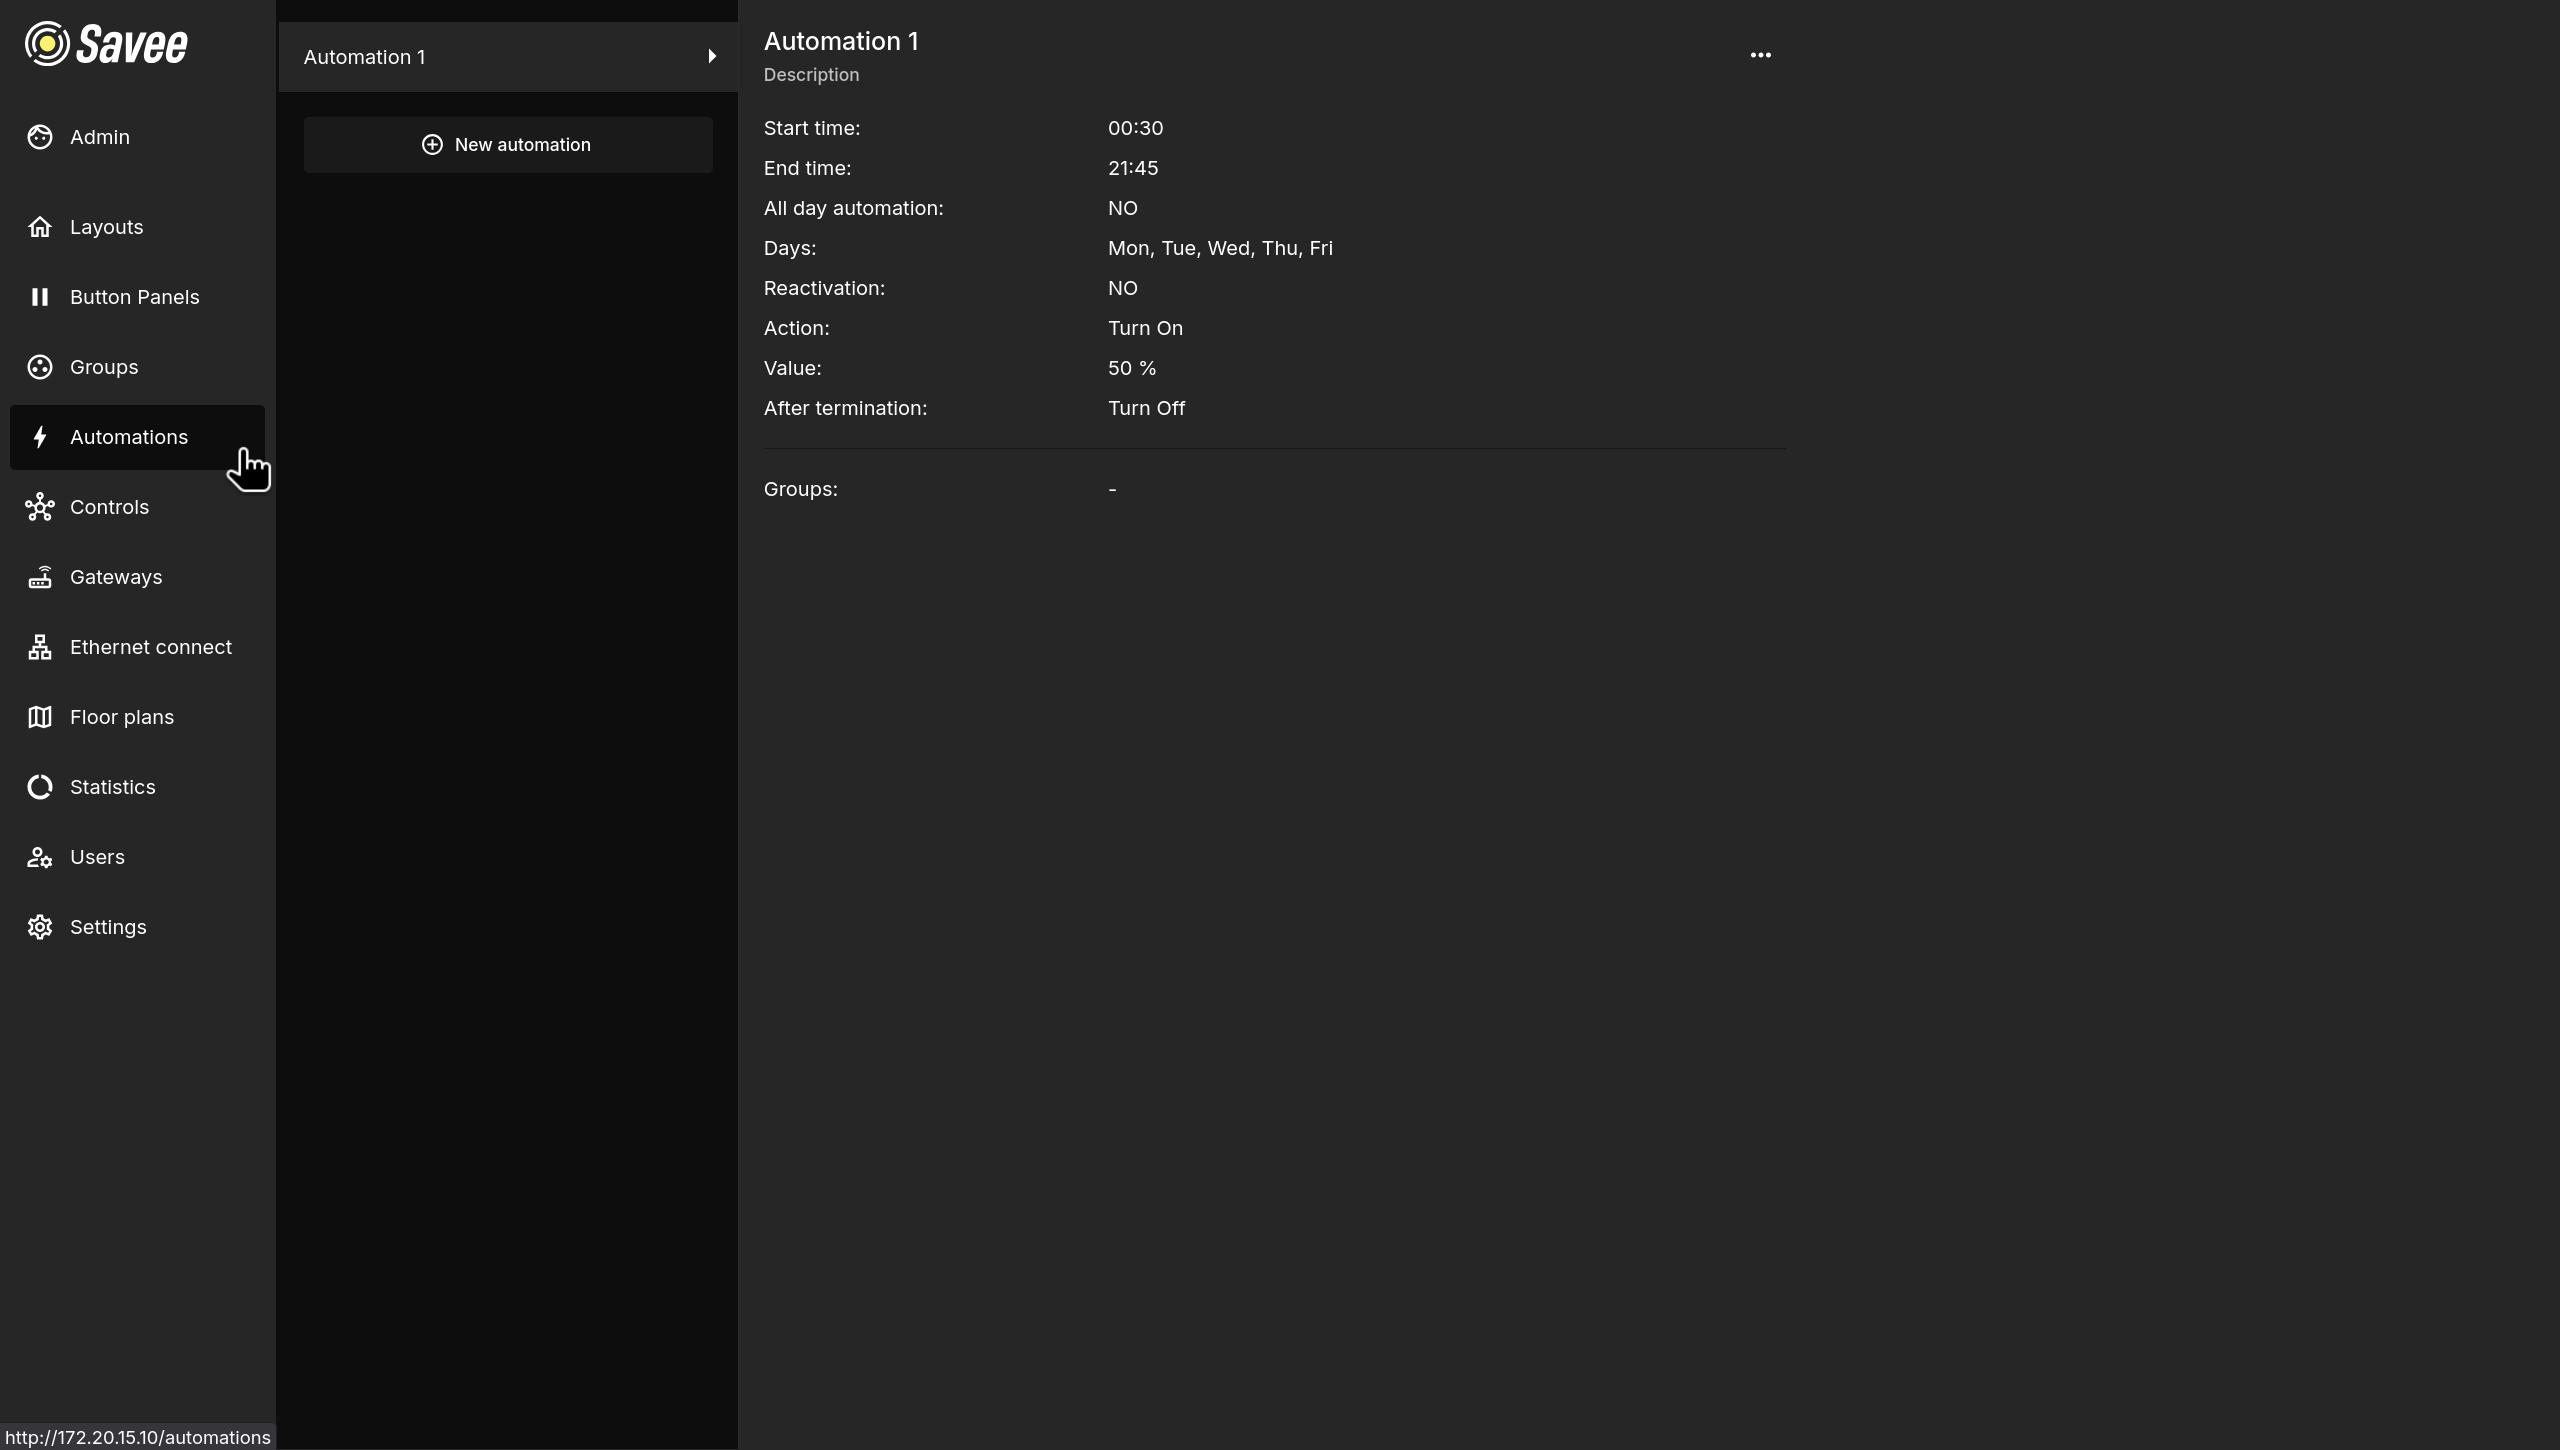
The detail view shows a summary of the automation's schedule, action, and which groups it is currently assigned to.
To create a new automation, click + New automation at the top of the list. Use the ⋯ menu in the detail view to edit or delete an existing automation.
Note
Automations are not active on their own. They must be assigned to a group in the Groups page to take effect.
Creating an Automation
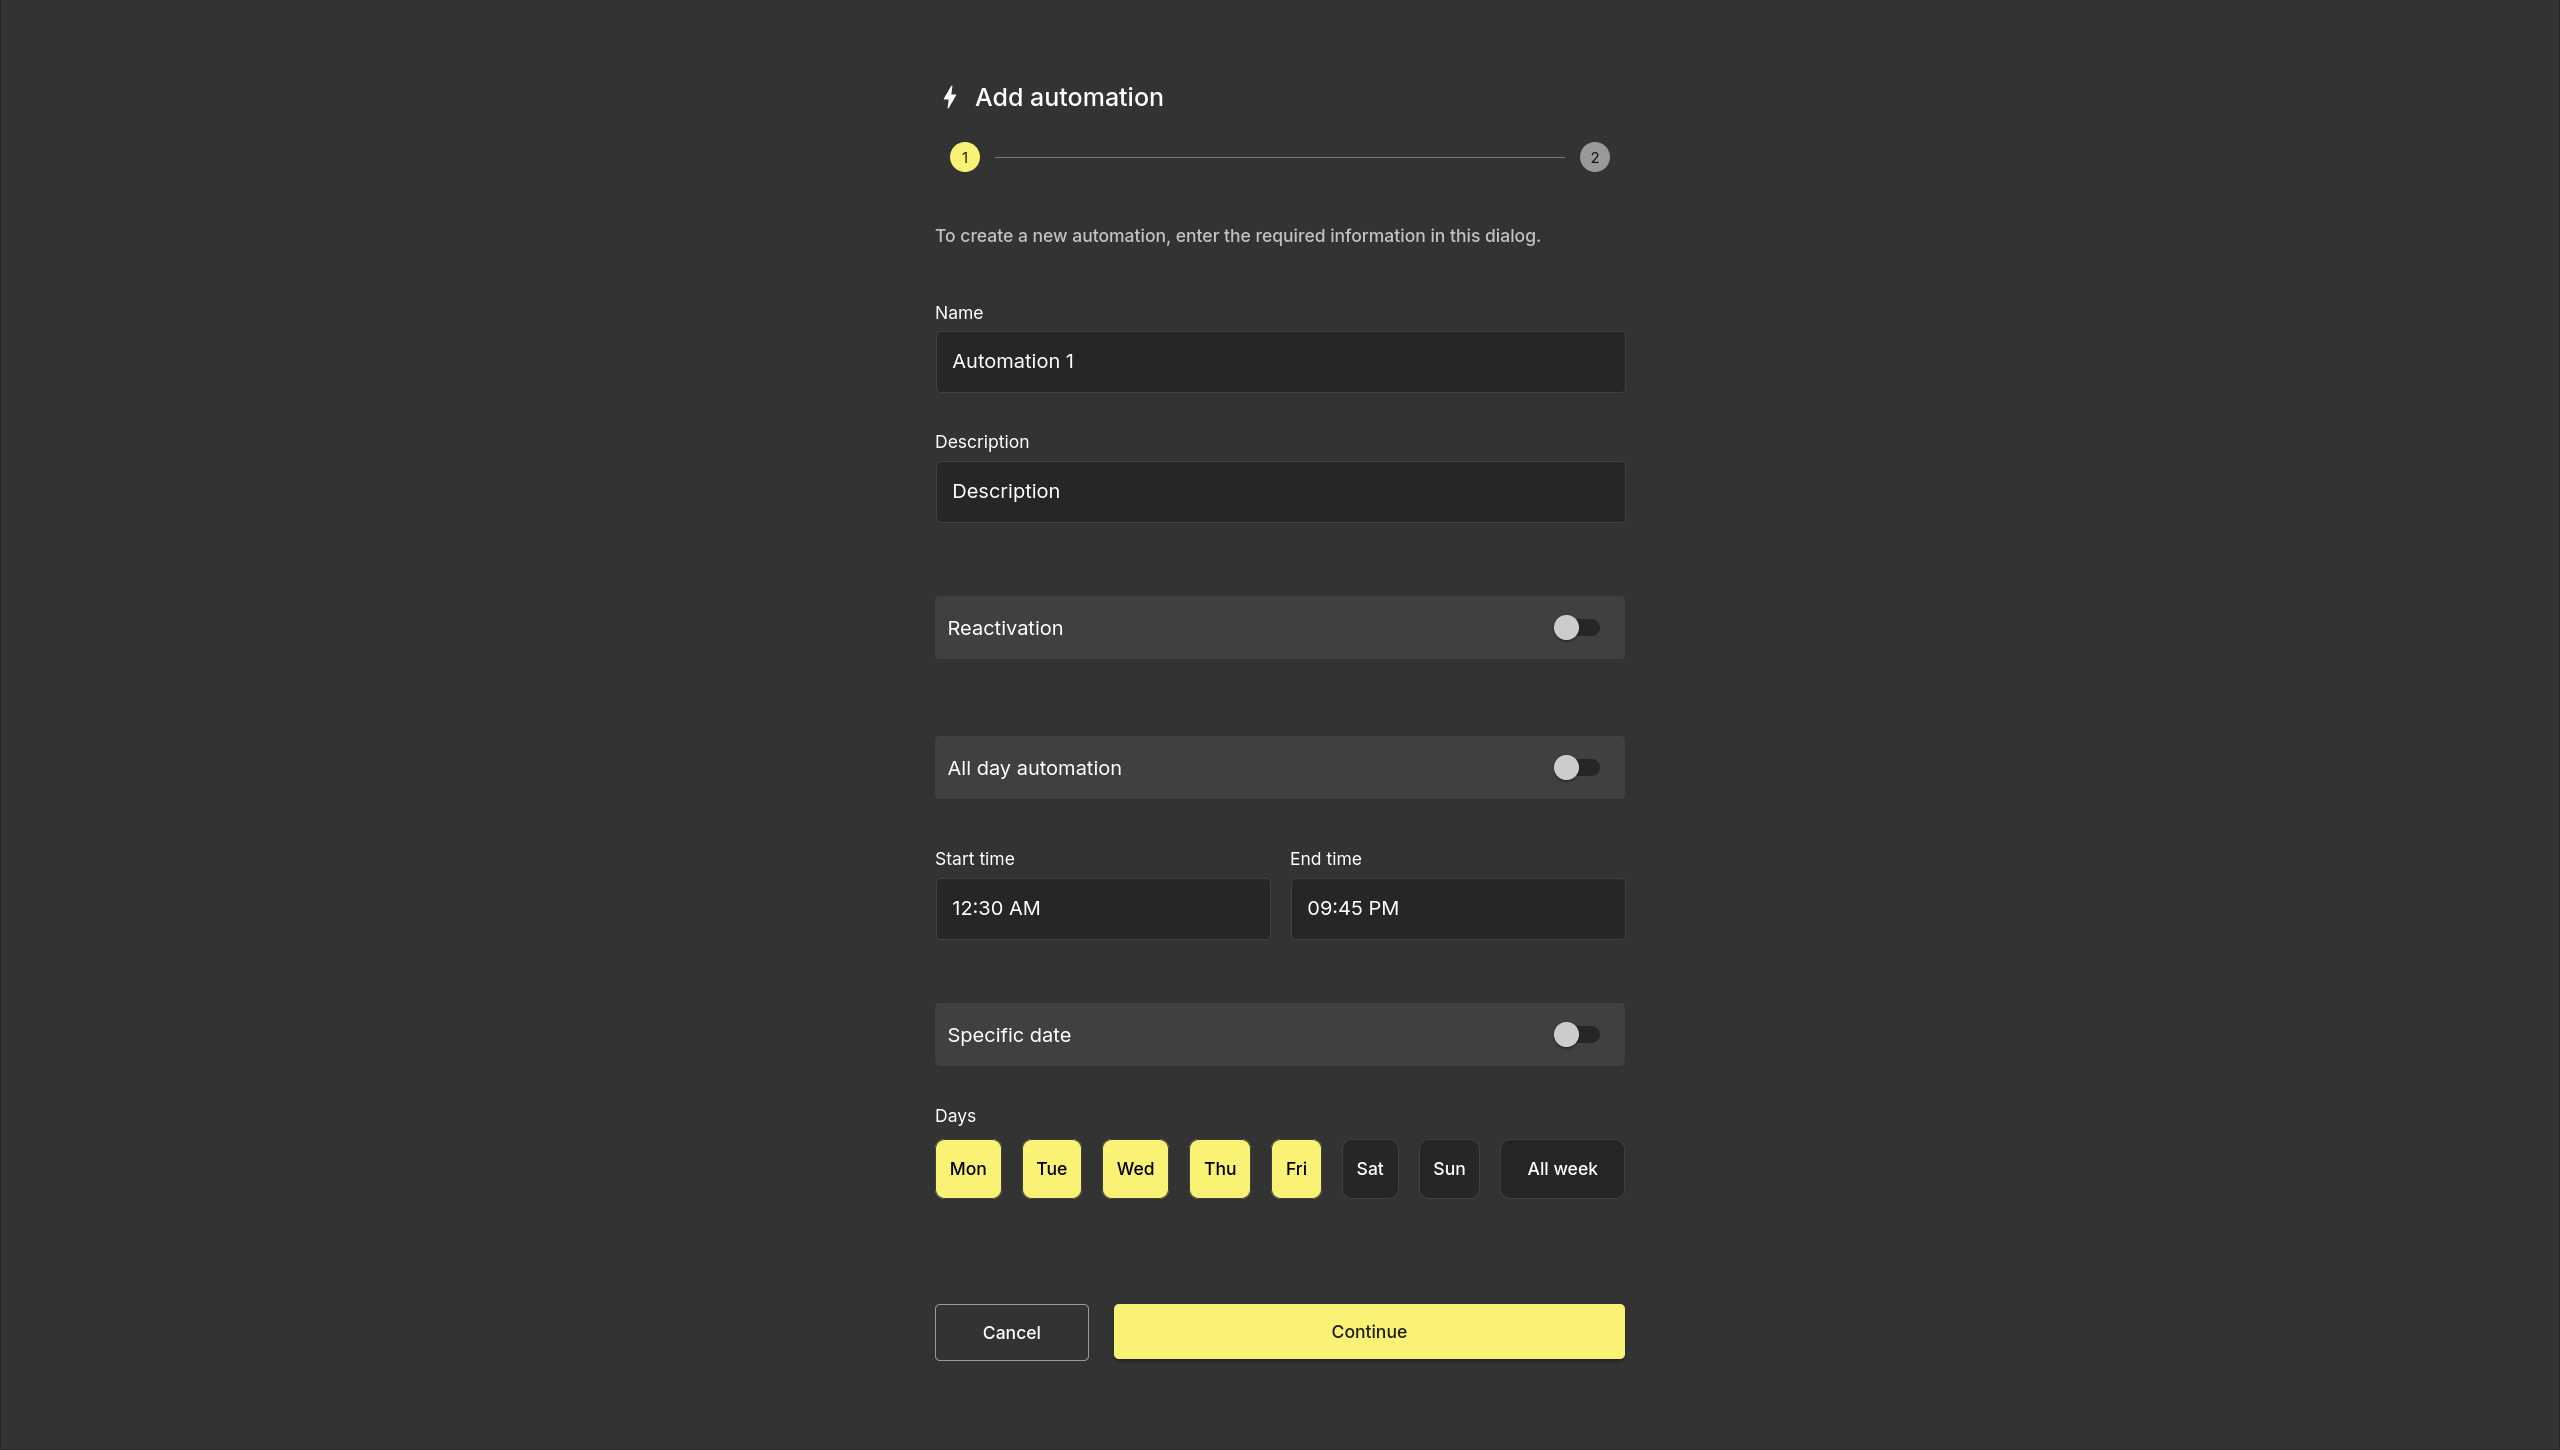
The Add automation wizard has two steps.
Step 1 — Schedule
| Field | Description |
|---|---|
| Name | A unique name to identify the automation. |
| Description | An optional description for additional context. |
| Reactivation | When enabled, the automation will reactivate itself at its start time even if it was manually turned off. |
| All day automation | When enabled, the start and end time fields are hidden and the automation runs for the entire day. |
| Start time / End time | The time window during which the automation is active. |
| Specific date | When enabled, the automation only runs on a chosen date rather than recurring weekly. |
| Days | The days of the week on which the automation runs. Select individual days or use All week. |
Click Continue to proceed to step 2.
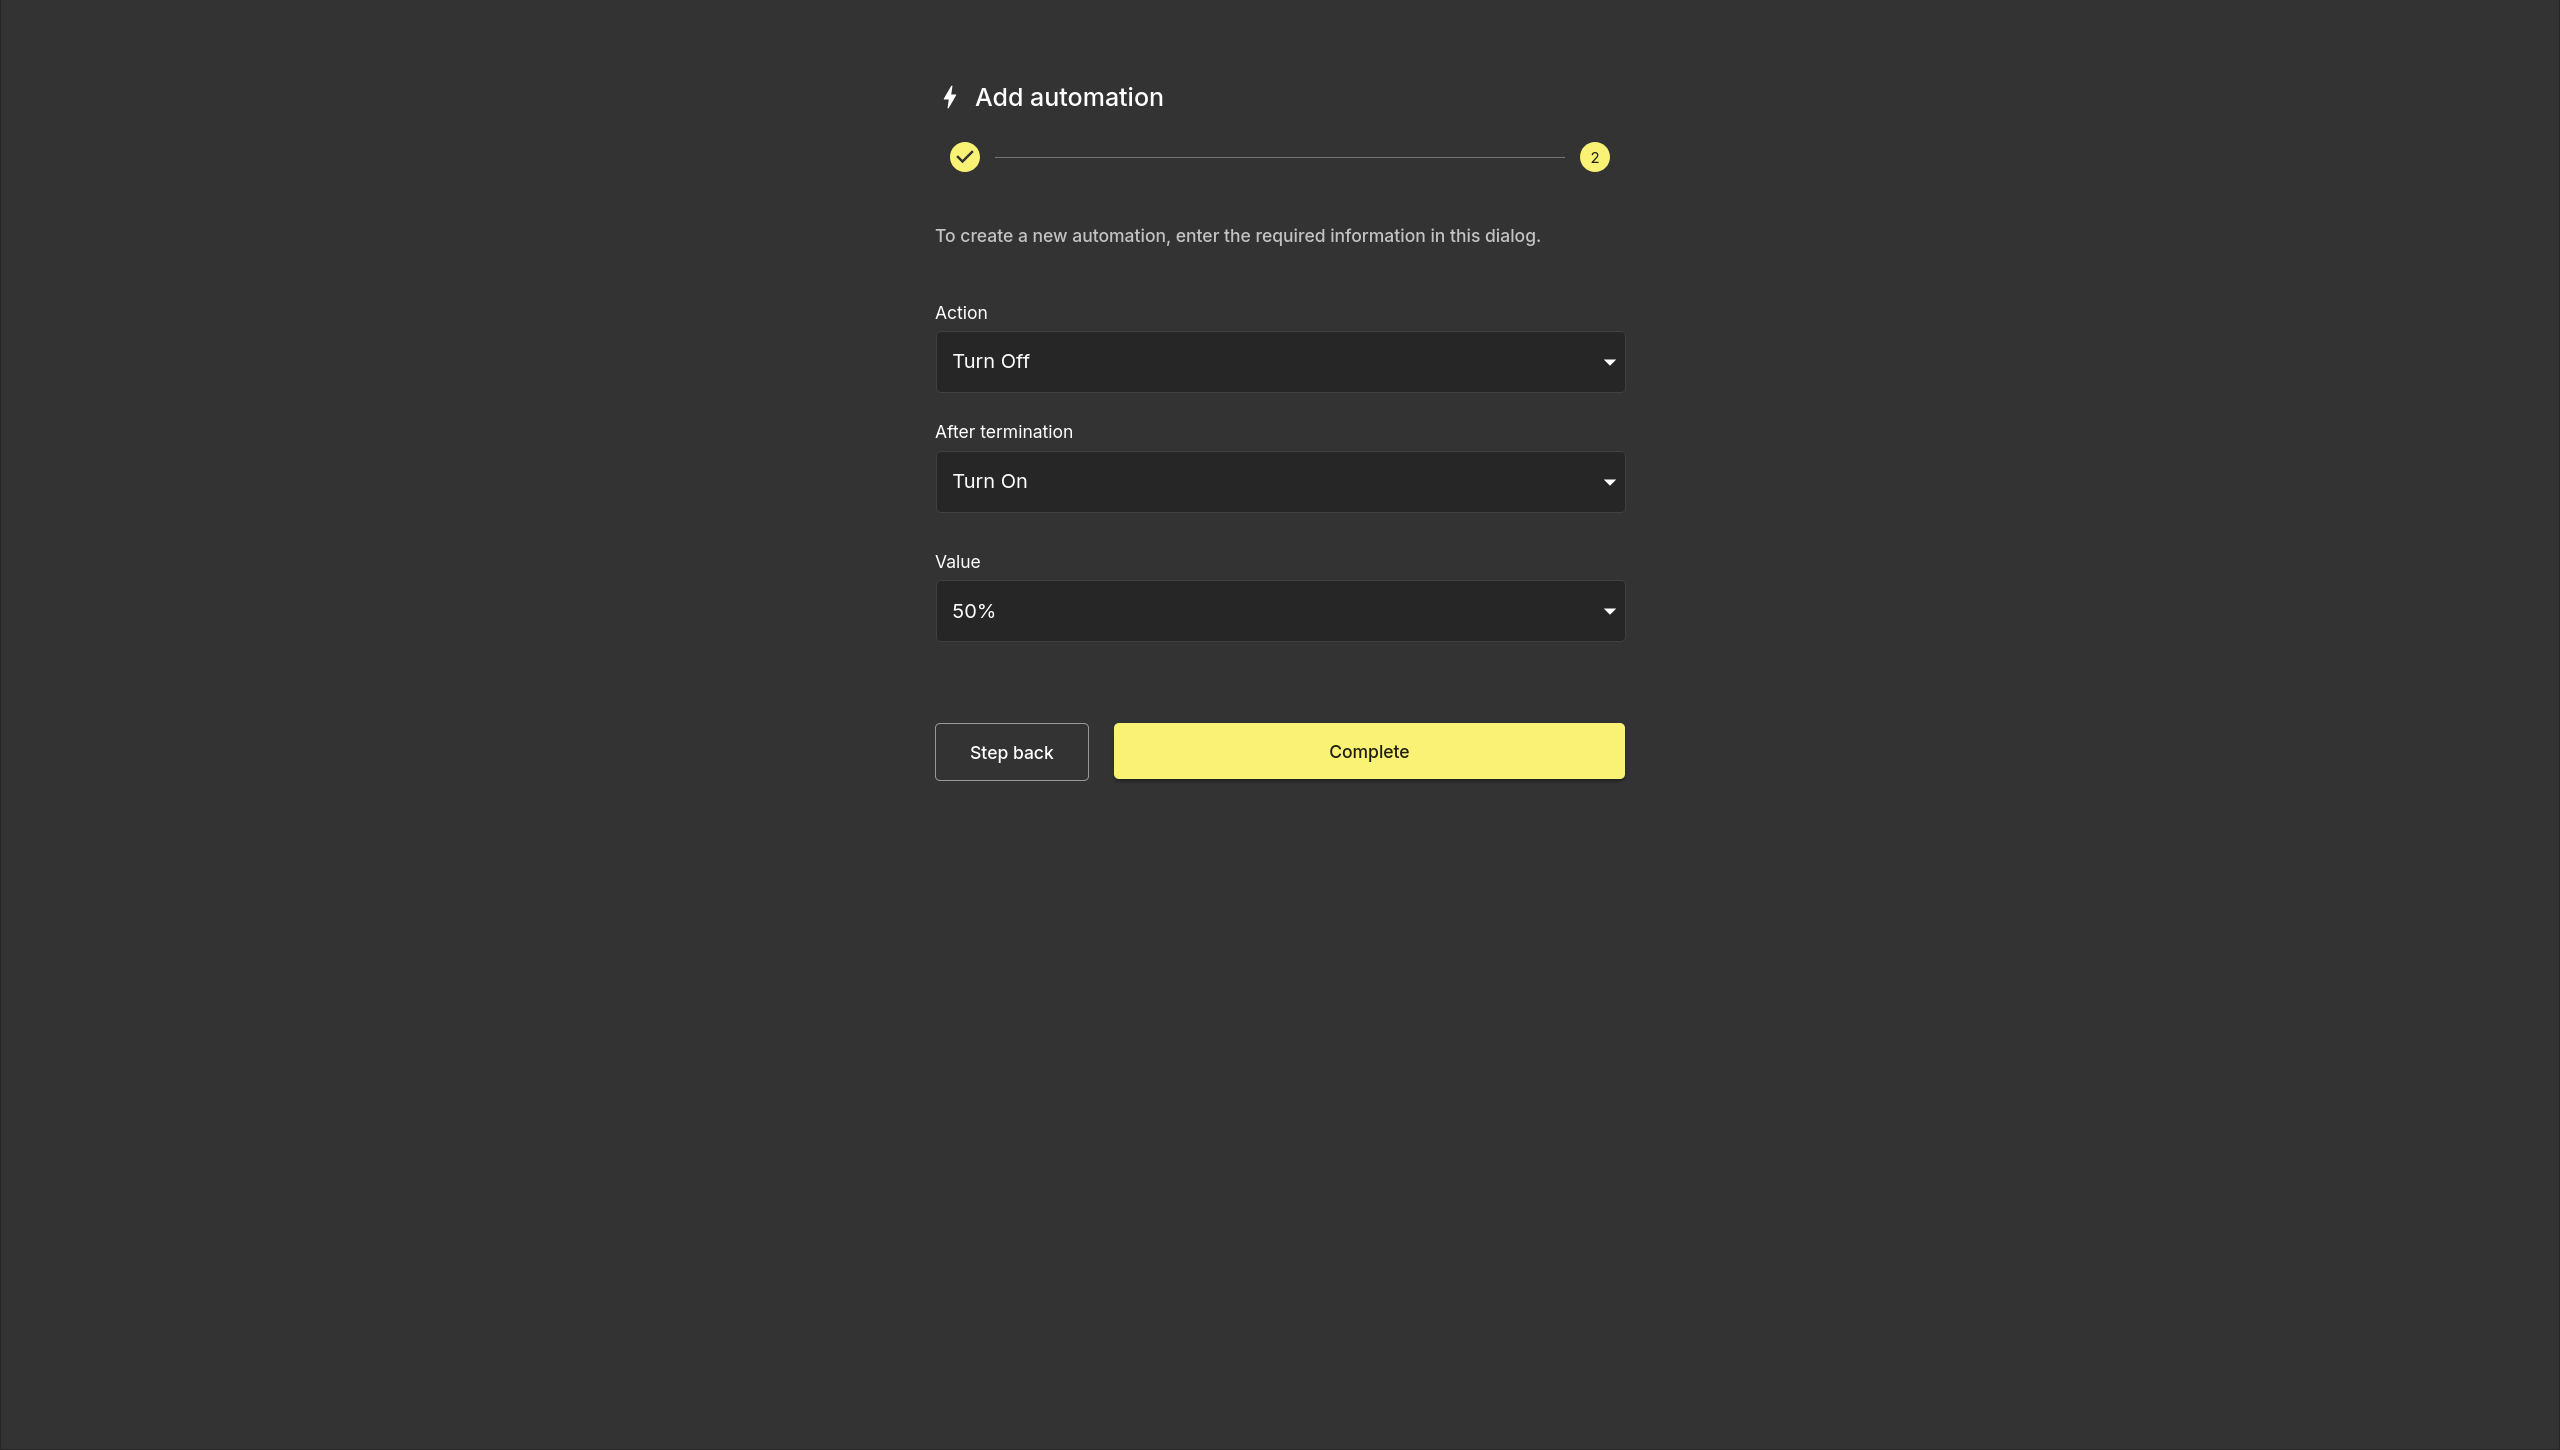
Step 2 — Action
In step 2, select the action the automation will perform from the Action dropdown. The available fields change depending on the selected action type.
All action types include an After termination field that defines what happens to the group when the automation's time window ends.
Action Types
Turn On
Sets the group to a specified output level at the automation's start time.
| Field | Description |
|---|---|
| Value | The output level (%) the group is set to when the automation activates. |
| After termination | What the group does when the automation ends (e.g. Turn Off). |

Turn Off
Turns the group off at the automation's start time.
| Field | Description |
|---|---|
| After termination | What the group does when the automation ends (e.g. Turn On). |
| Value | The output level (%) applied when the after-termination action is Turn On. |
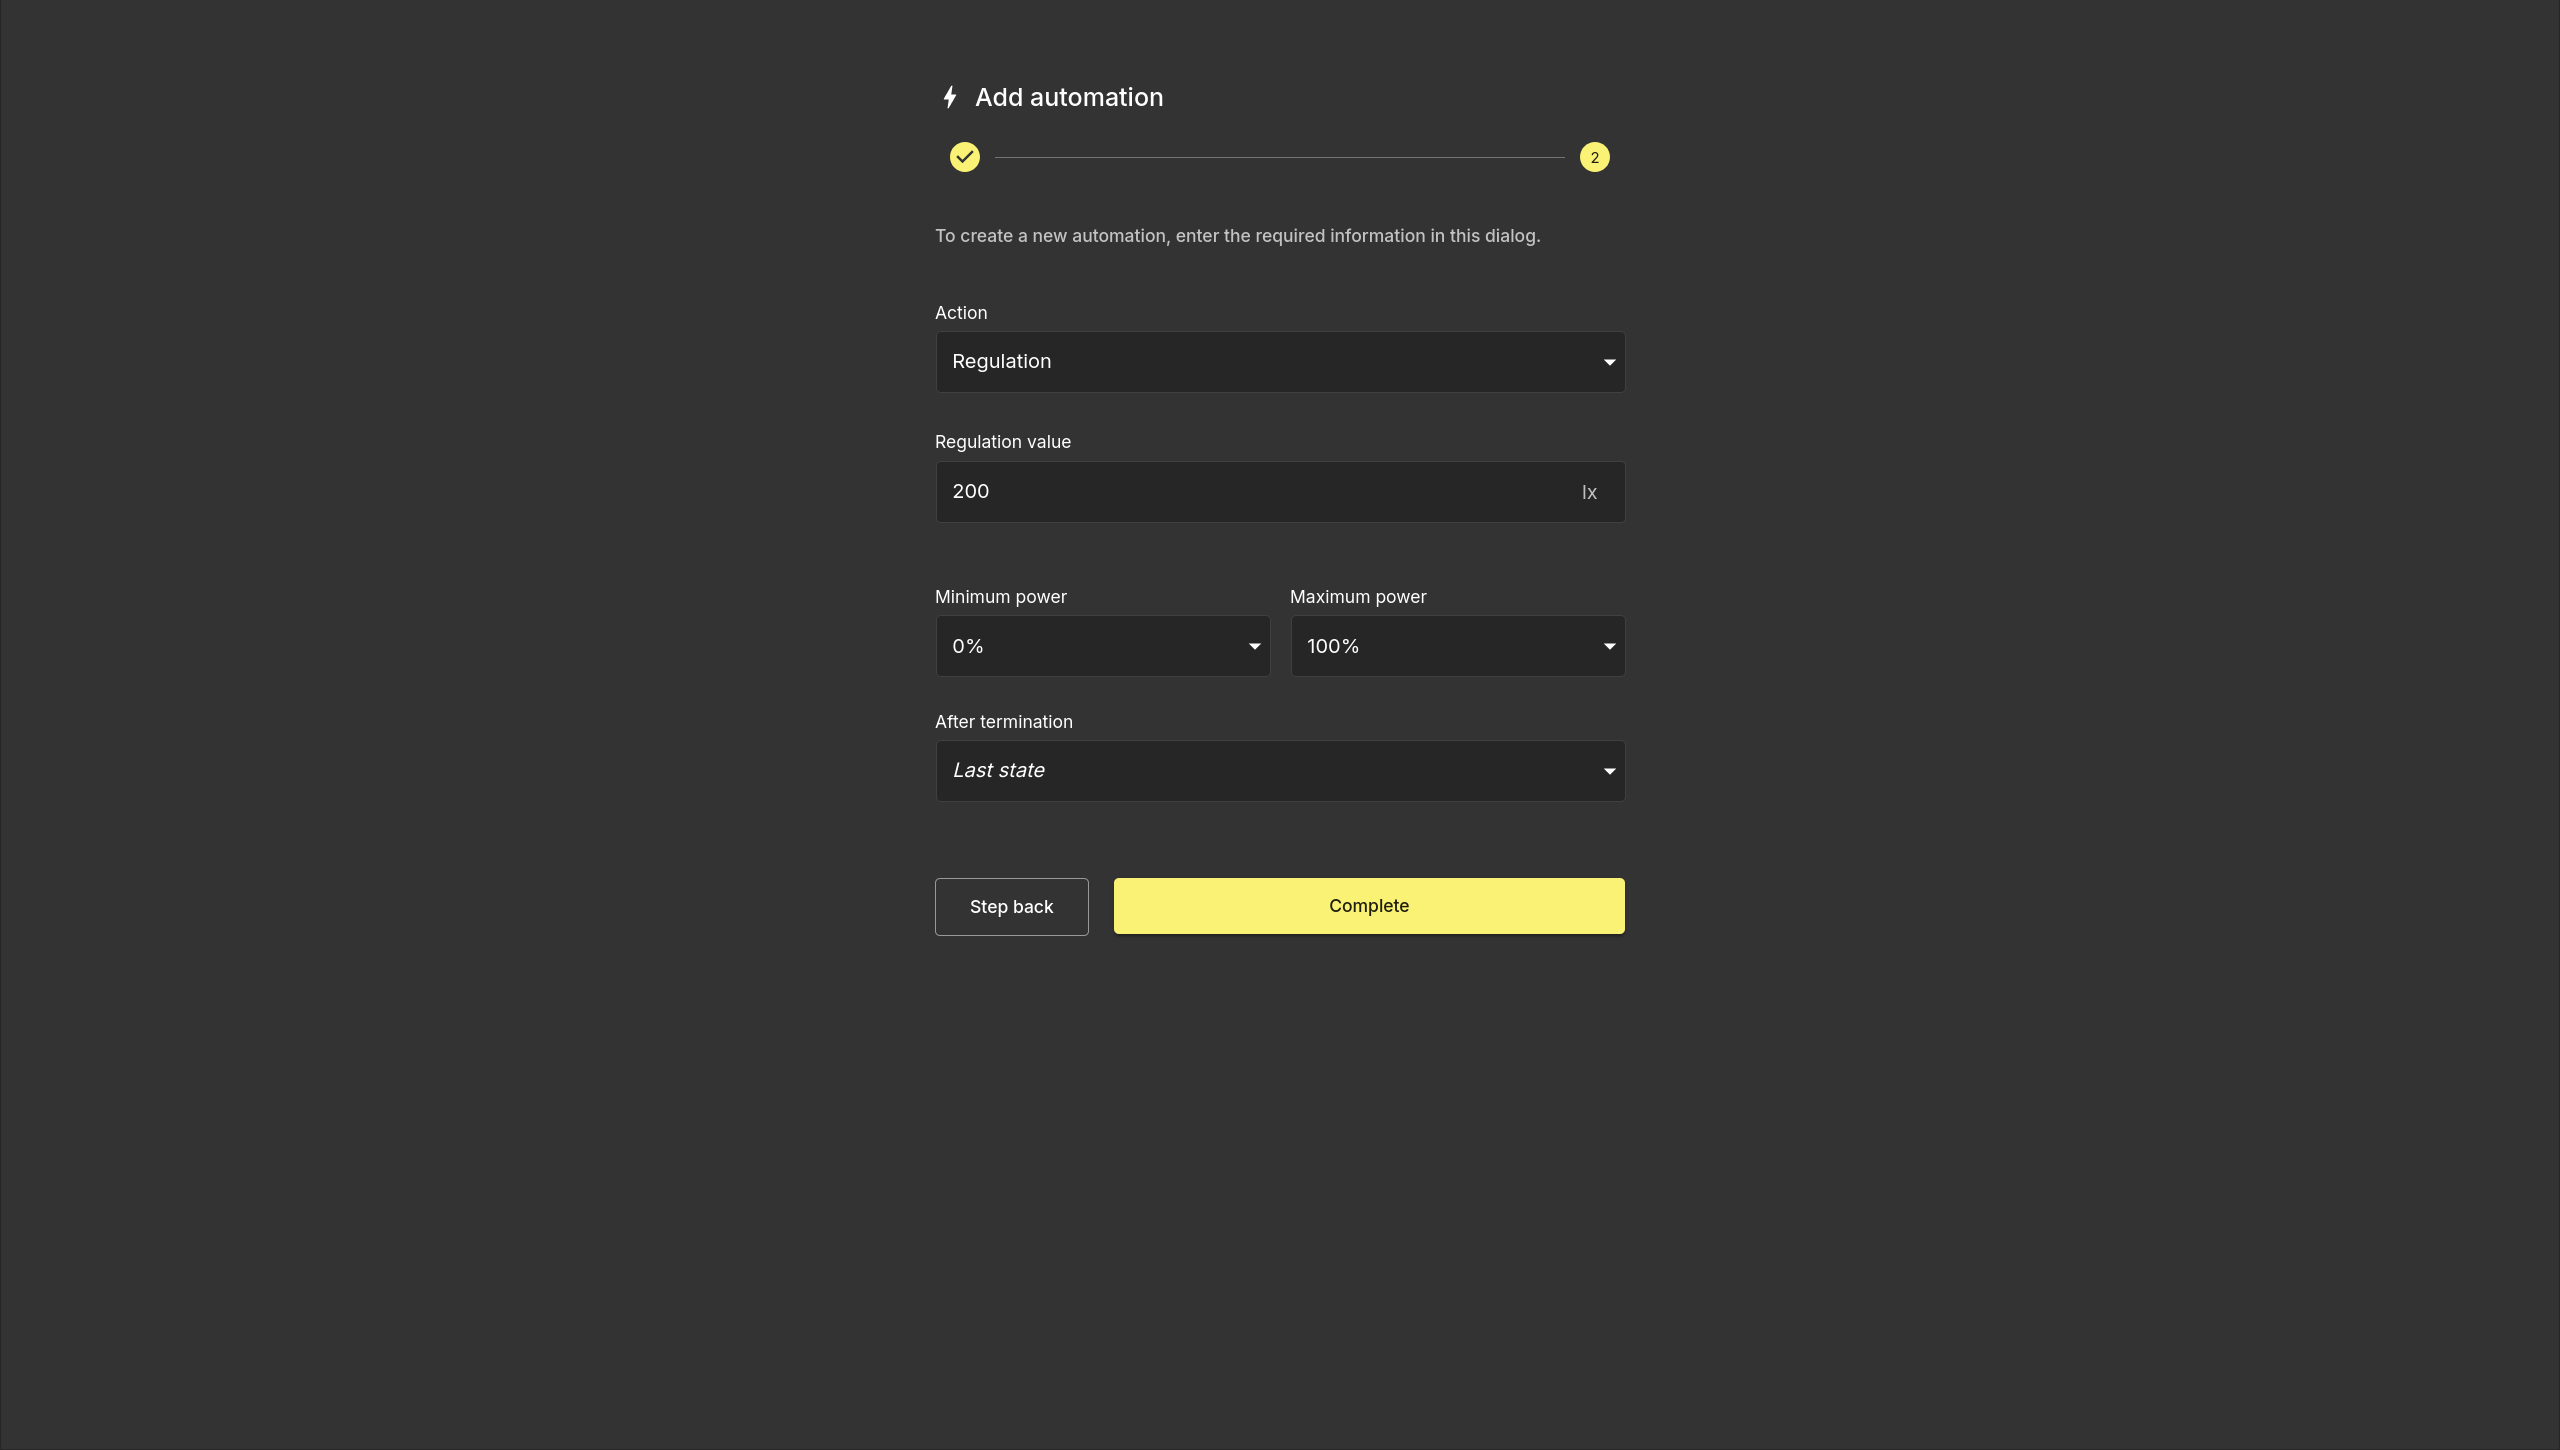
Regulation
Automatically adjusts the group's output to maintain a target lux level. The automation reads from the group's sensor and continuously corrects the output to hit the set value.
| Field | Description |
|---|---|
| Regulation value | The target lux level to maintain. |
| Minimum power | The lowest output level the automation may set. |
| Maximum power | The highest output level the automation may set. |
| After termination | What the group does when the automation ends. |
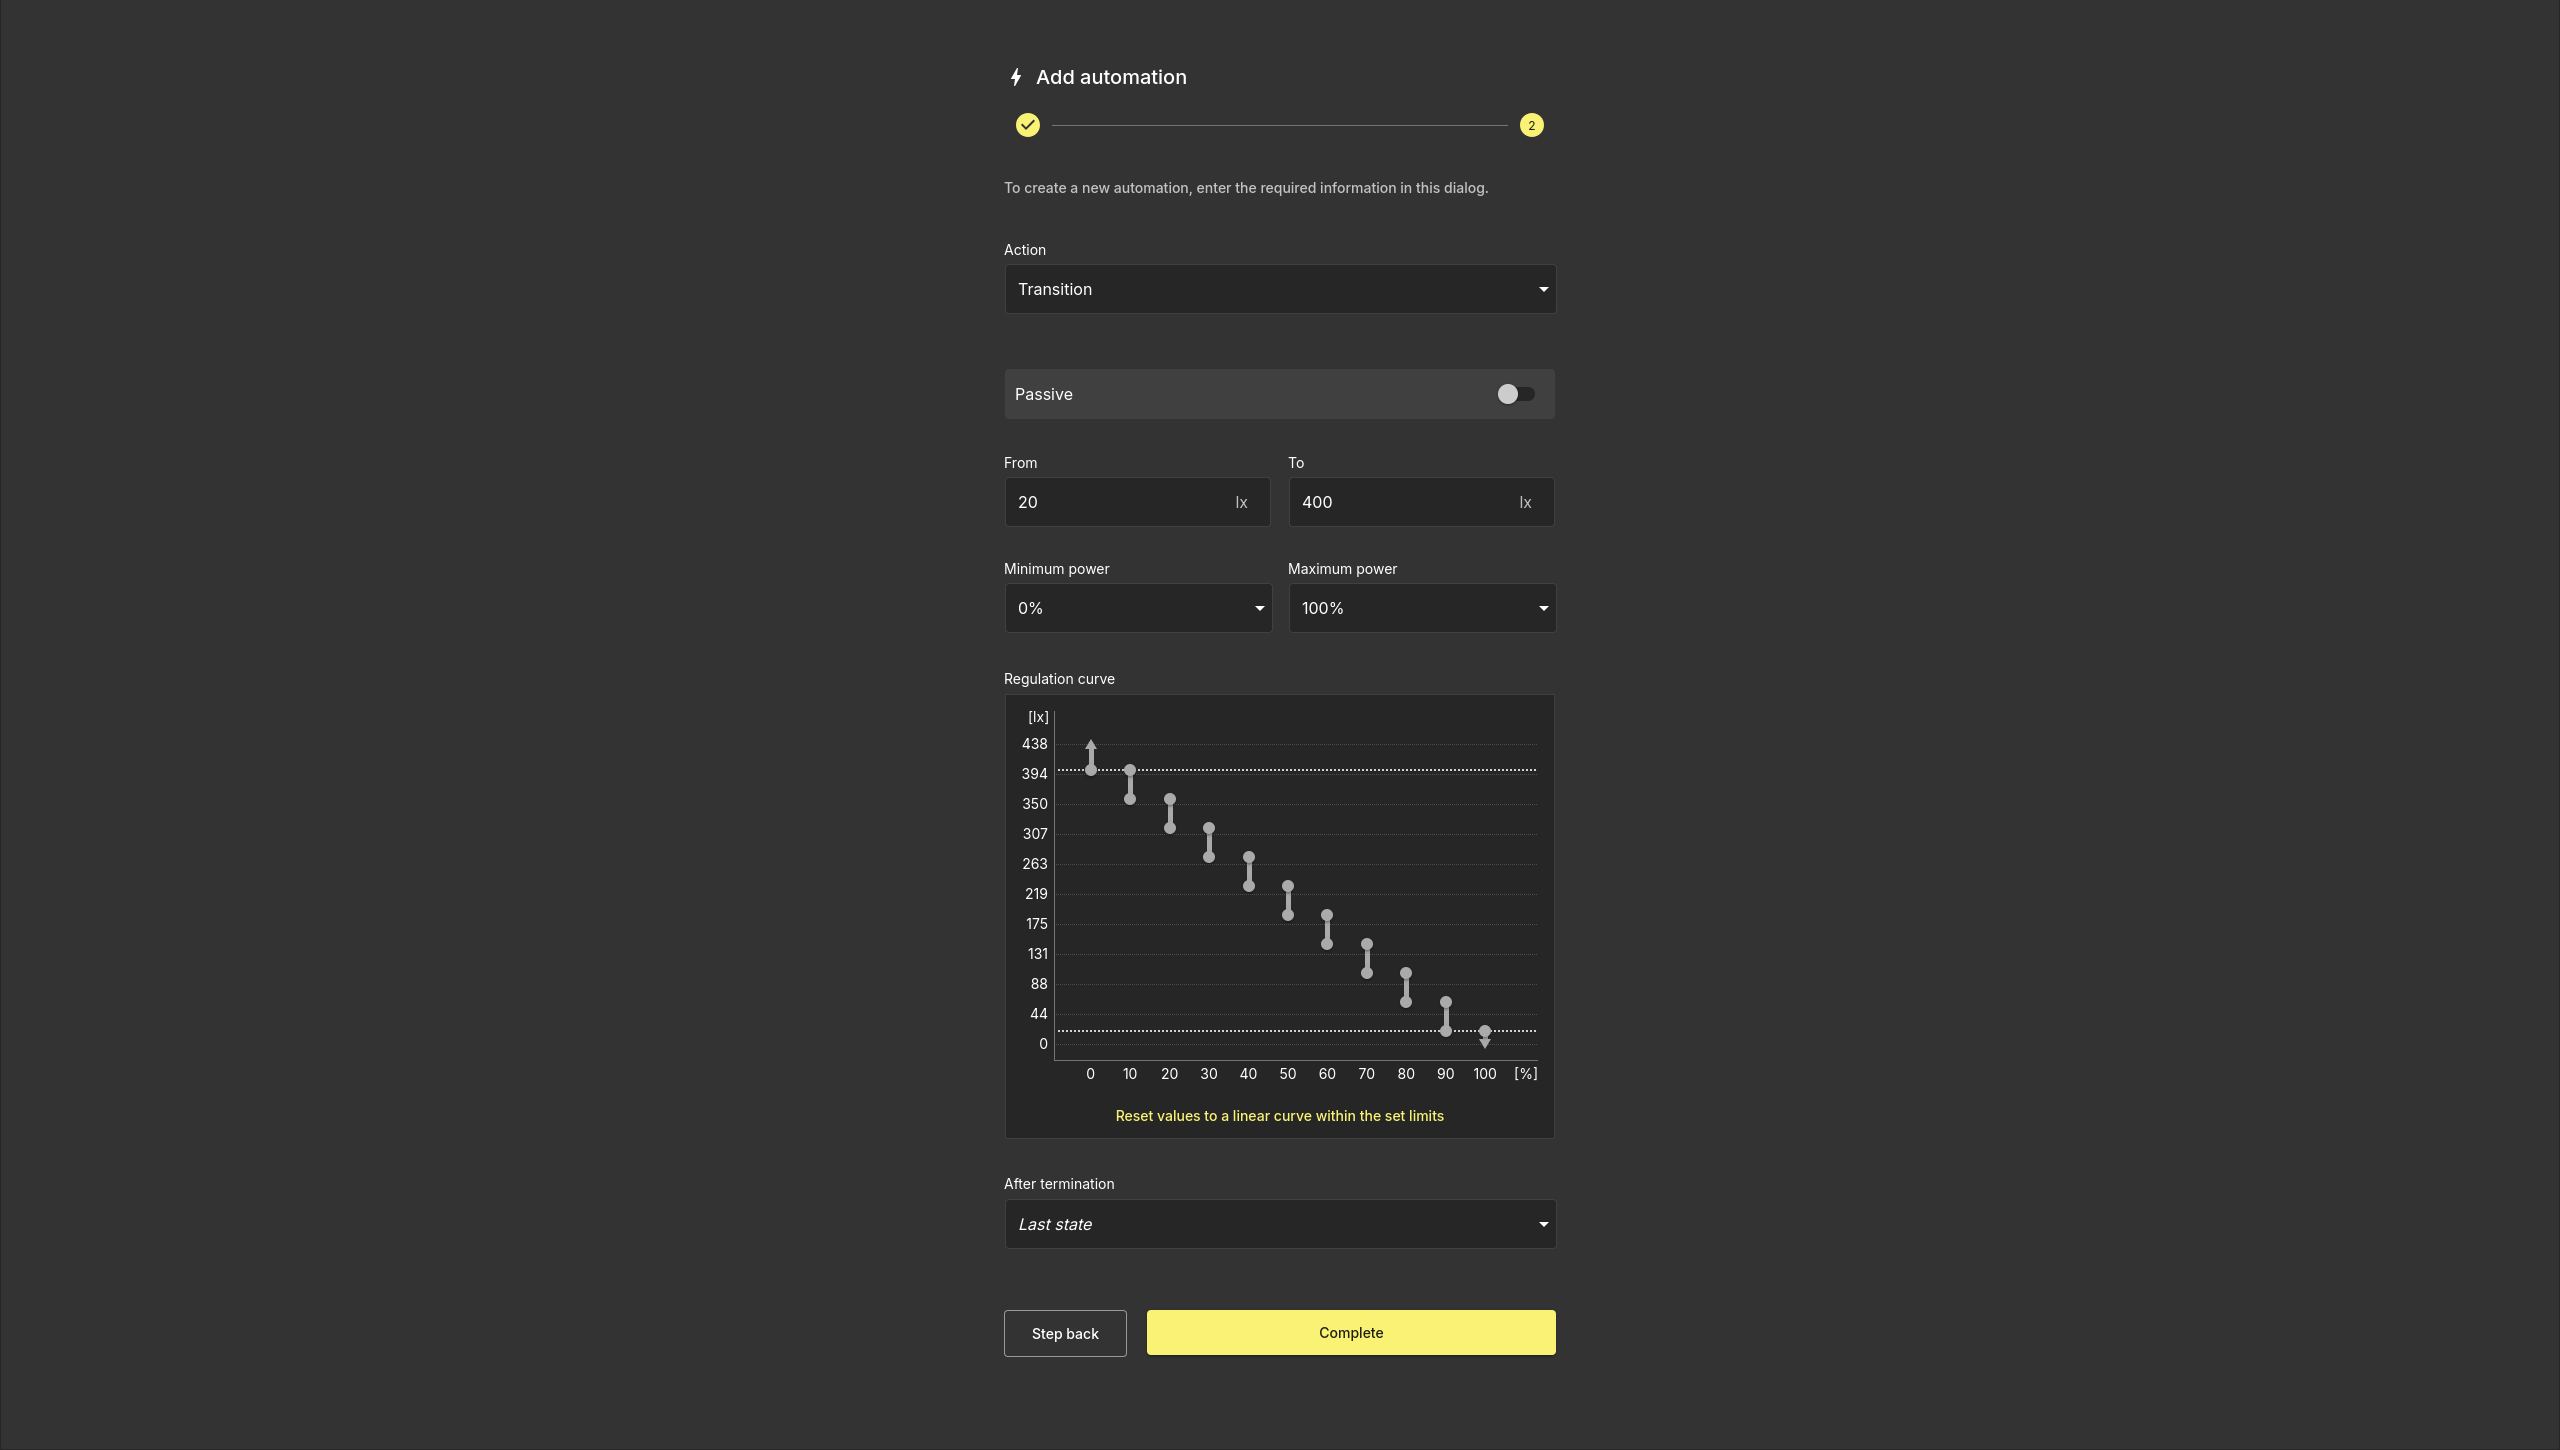
Transition
Adjusts the group's output according to a customizable regulation curve, mapped against a measured lux range. Useful for creating gradual lighting changes that track natural light conditions.
| Field | Description |
|---|---|
| Passive | When enabled, the automation regulates the output level but still allows manual ON/OFF control of the group. |
| From / To | The lux range over which the regulation curve applies. |
| Minimum power | The lowest output level the automation may set. |
| Maximum power | The highest output level the automation may set. |
| Regulation curve | An interactive graph mapping lux input (Y axis) to output power (X axis). Drag the points to shape the curve. Use Reset values to a linear curve within the set limits to reset to a straight line. |
| After termination | What the group does when the automation ends. |
Note
When using Transition in passive mode, any virtual buttons that control the ON/OFF state of the lighting must have their action values set to Previous instead of a fixed percentage (e.g. 10% or 30%). This ensures the lights turn on to the level set by the automation rather than overriding it with a set value.
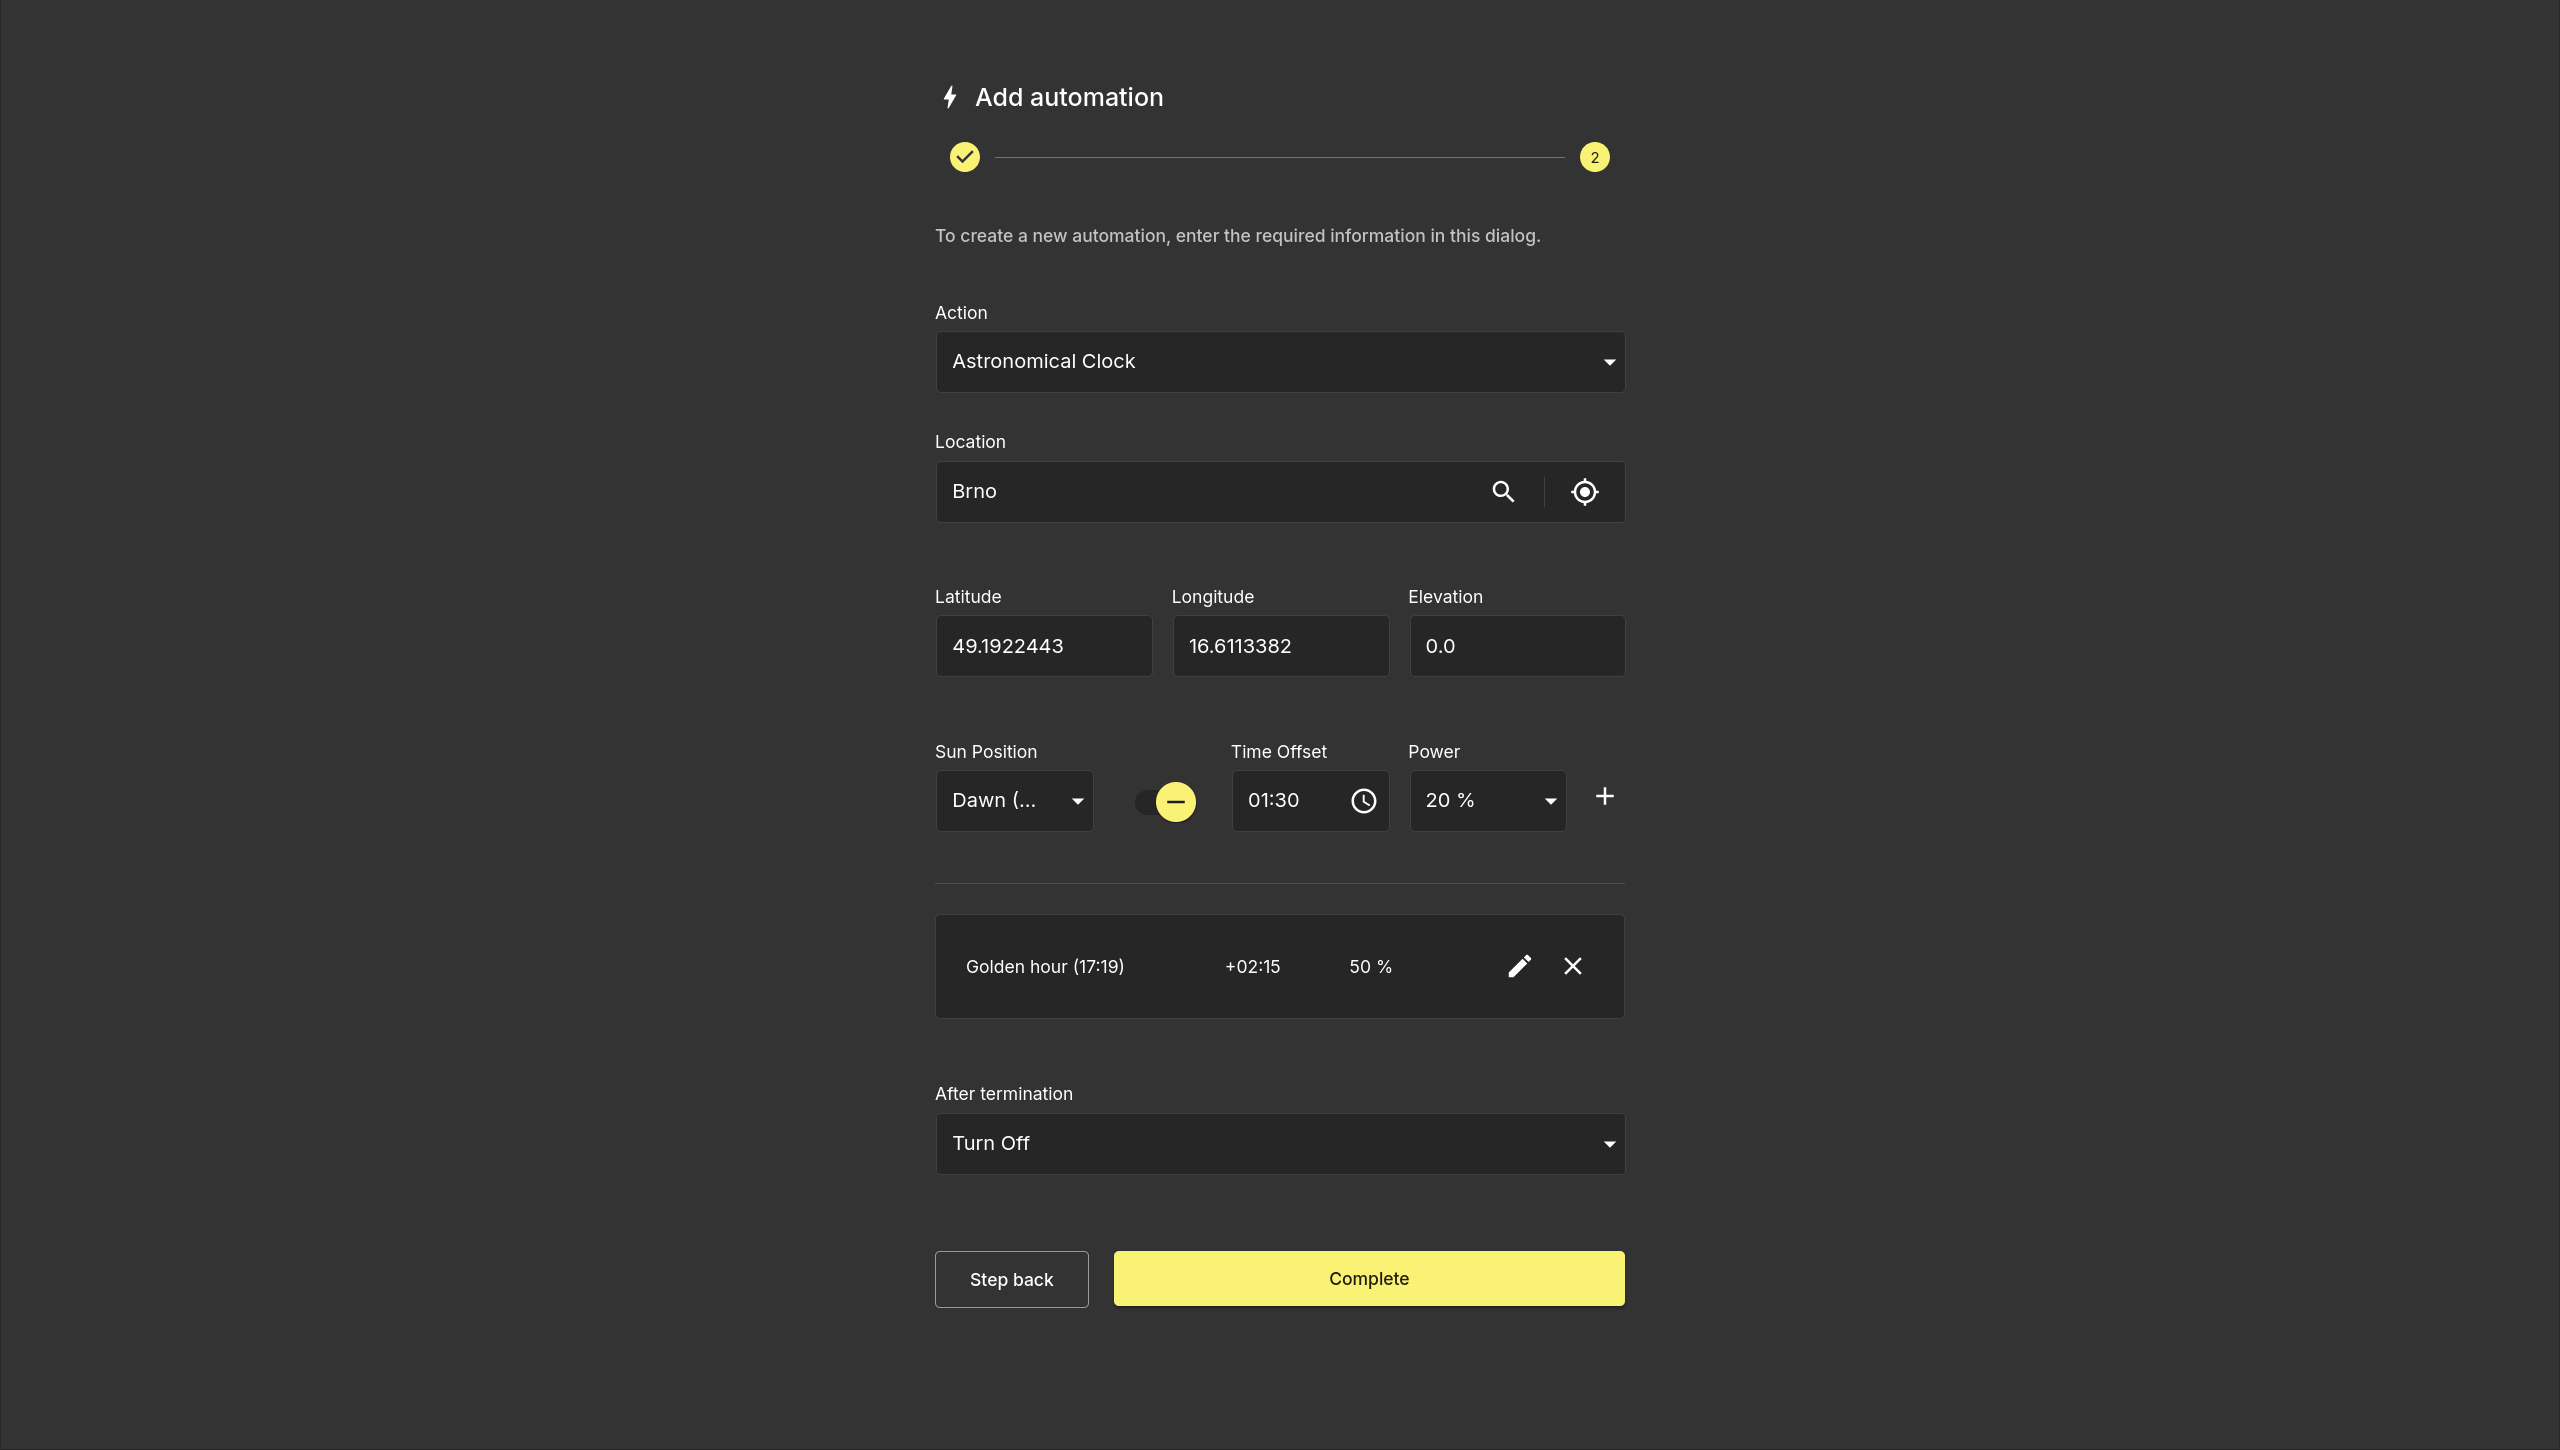
Astronomical Clock
Controls the group based on the sun's position rather than a fixed clock time. Multiple sun position entries can be added to build a full day schedule that follows sunrise, sunset, and other solar events.
| Field | Description |
|---|---|
| Location | The location used to calculate sun positions. Search by name or use the locate button to use the current position. |
| Latitude / Longitude / Elevation | Coordinates auto-filled from the location search, or entered manually. |
| Sun Position | The solar event to trigger on (e.g. Dawn, Sunrise, Golden hour, Sunset, Dusk). |
| Time Offset | A positive or negative offset applied to the sun position time. |
| Power | The output level (%) the group is set to at this sun position. |
Click + to add additional sun position entries. Each entry is listed below the input row and can be edited or removed individually.
| Field | Description |
|---|---|
| After termination | What the group does when the automation ends. |
Click Complete to save the automation.