Controls
Overview
The Controls page lists all devices paired to the Savee network in a sortable, filterable table. It provides a central view of every device's current state, type, gateway connection, and any custom properties.
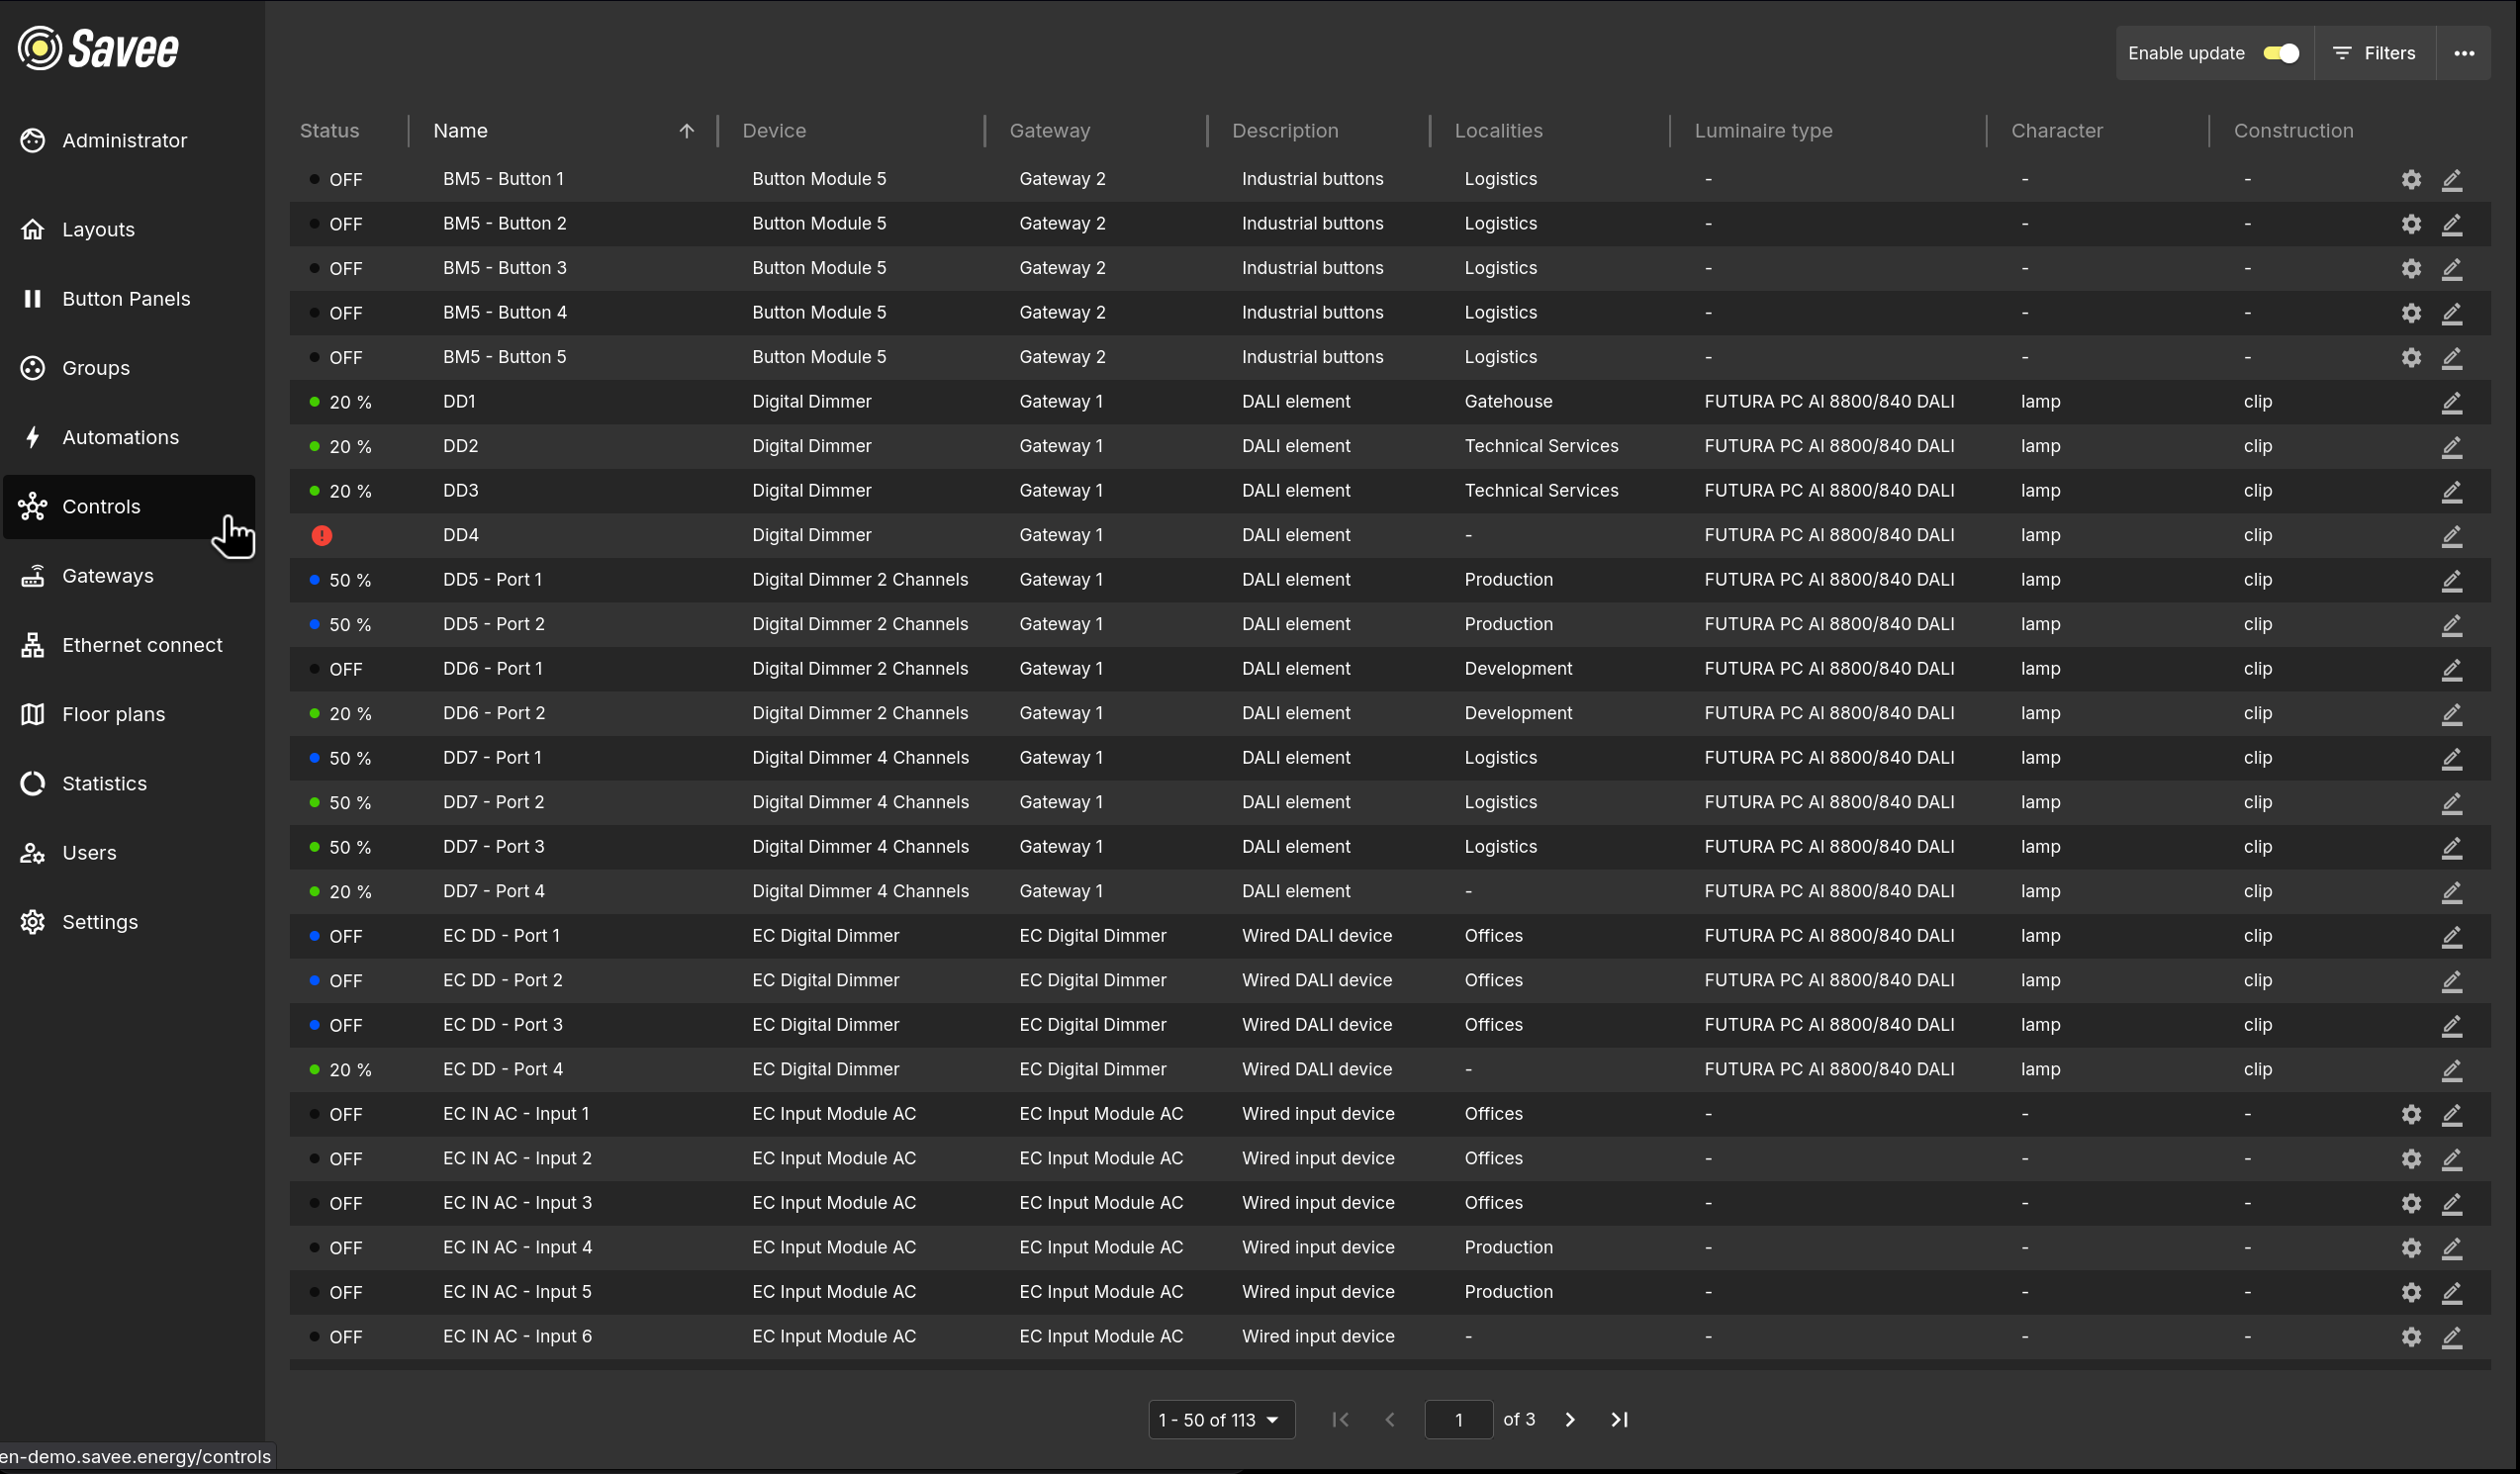
Table Columns
The table includes the following default columns:
| Column | Description |
|---|---|
| Status | A colored dot and label showing the device's current state (e.g. OFF, ON, 100 %). |
| Name | The device's name. Click the column header to sort. |
| Device | The device type (e.g. Digital Dimmer, EC Input Module AC, EC Relay Module). |
| Gateway | The gateway the device is connected to. |
| Description | A short description of the device. |
Additional custom columns (such as power consumption or location) can be added via Manage Columns.
The table is paginated. Use the page controls at the bottom to navigate between pages or change how many rows are shown per page.
Top Bar Controls
Enable Update
The Enable update toggle in the top-right corner enables editing controls on each row. When active:
- A pencil icon appears on every row, opening a dialog to edit the device's name and description.
- A gear icon appears on Input Module rows, opening the action block editor for that device.
Filters
Click Filters to show a filter row above the table. Each column gets its own text input for filtering by name, device type, gateway, or any other visible column value. Partial matches are supported.
More Options (⋯)
Bulk Editing
Enables checkboxes on each row so multiple devices can be selected at once. Once devices are selected, the following bulk actions become available:
Rename — Renames all selected devices using one of three methods:
| Method | Description |
|---|---|
| Replace | Finds a given string in each device name and replaces it with a new string. |
| Overwrite | Replaces the entire name of each selected device with a new name. |
| Append | Adds a given string to the end of each selected device's current name. |
Edit Fade Time — Sets the Fade Time on all selected Digital Dimmers at once.
Edit Custom Values
When enabled, the values in custom columns become editable directly in the table.
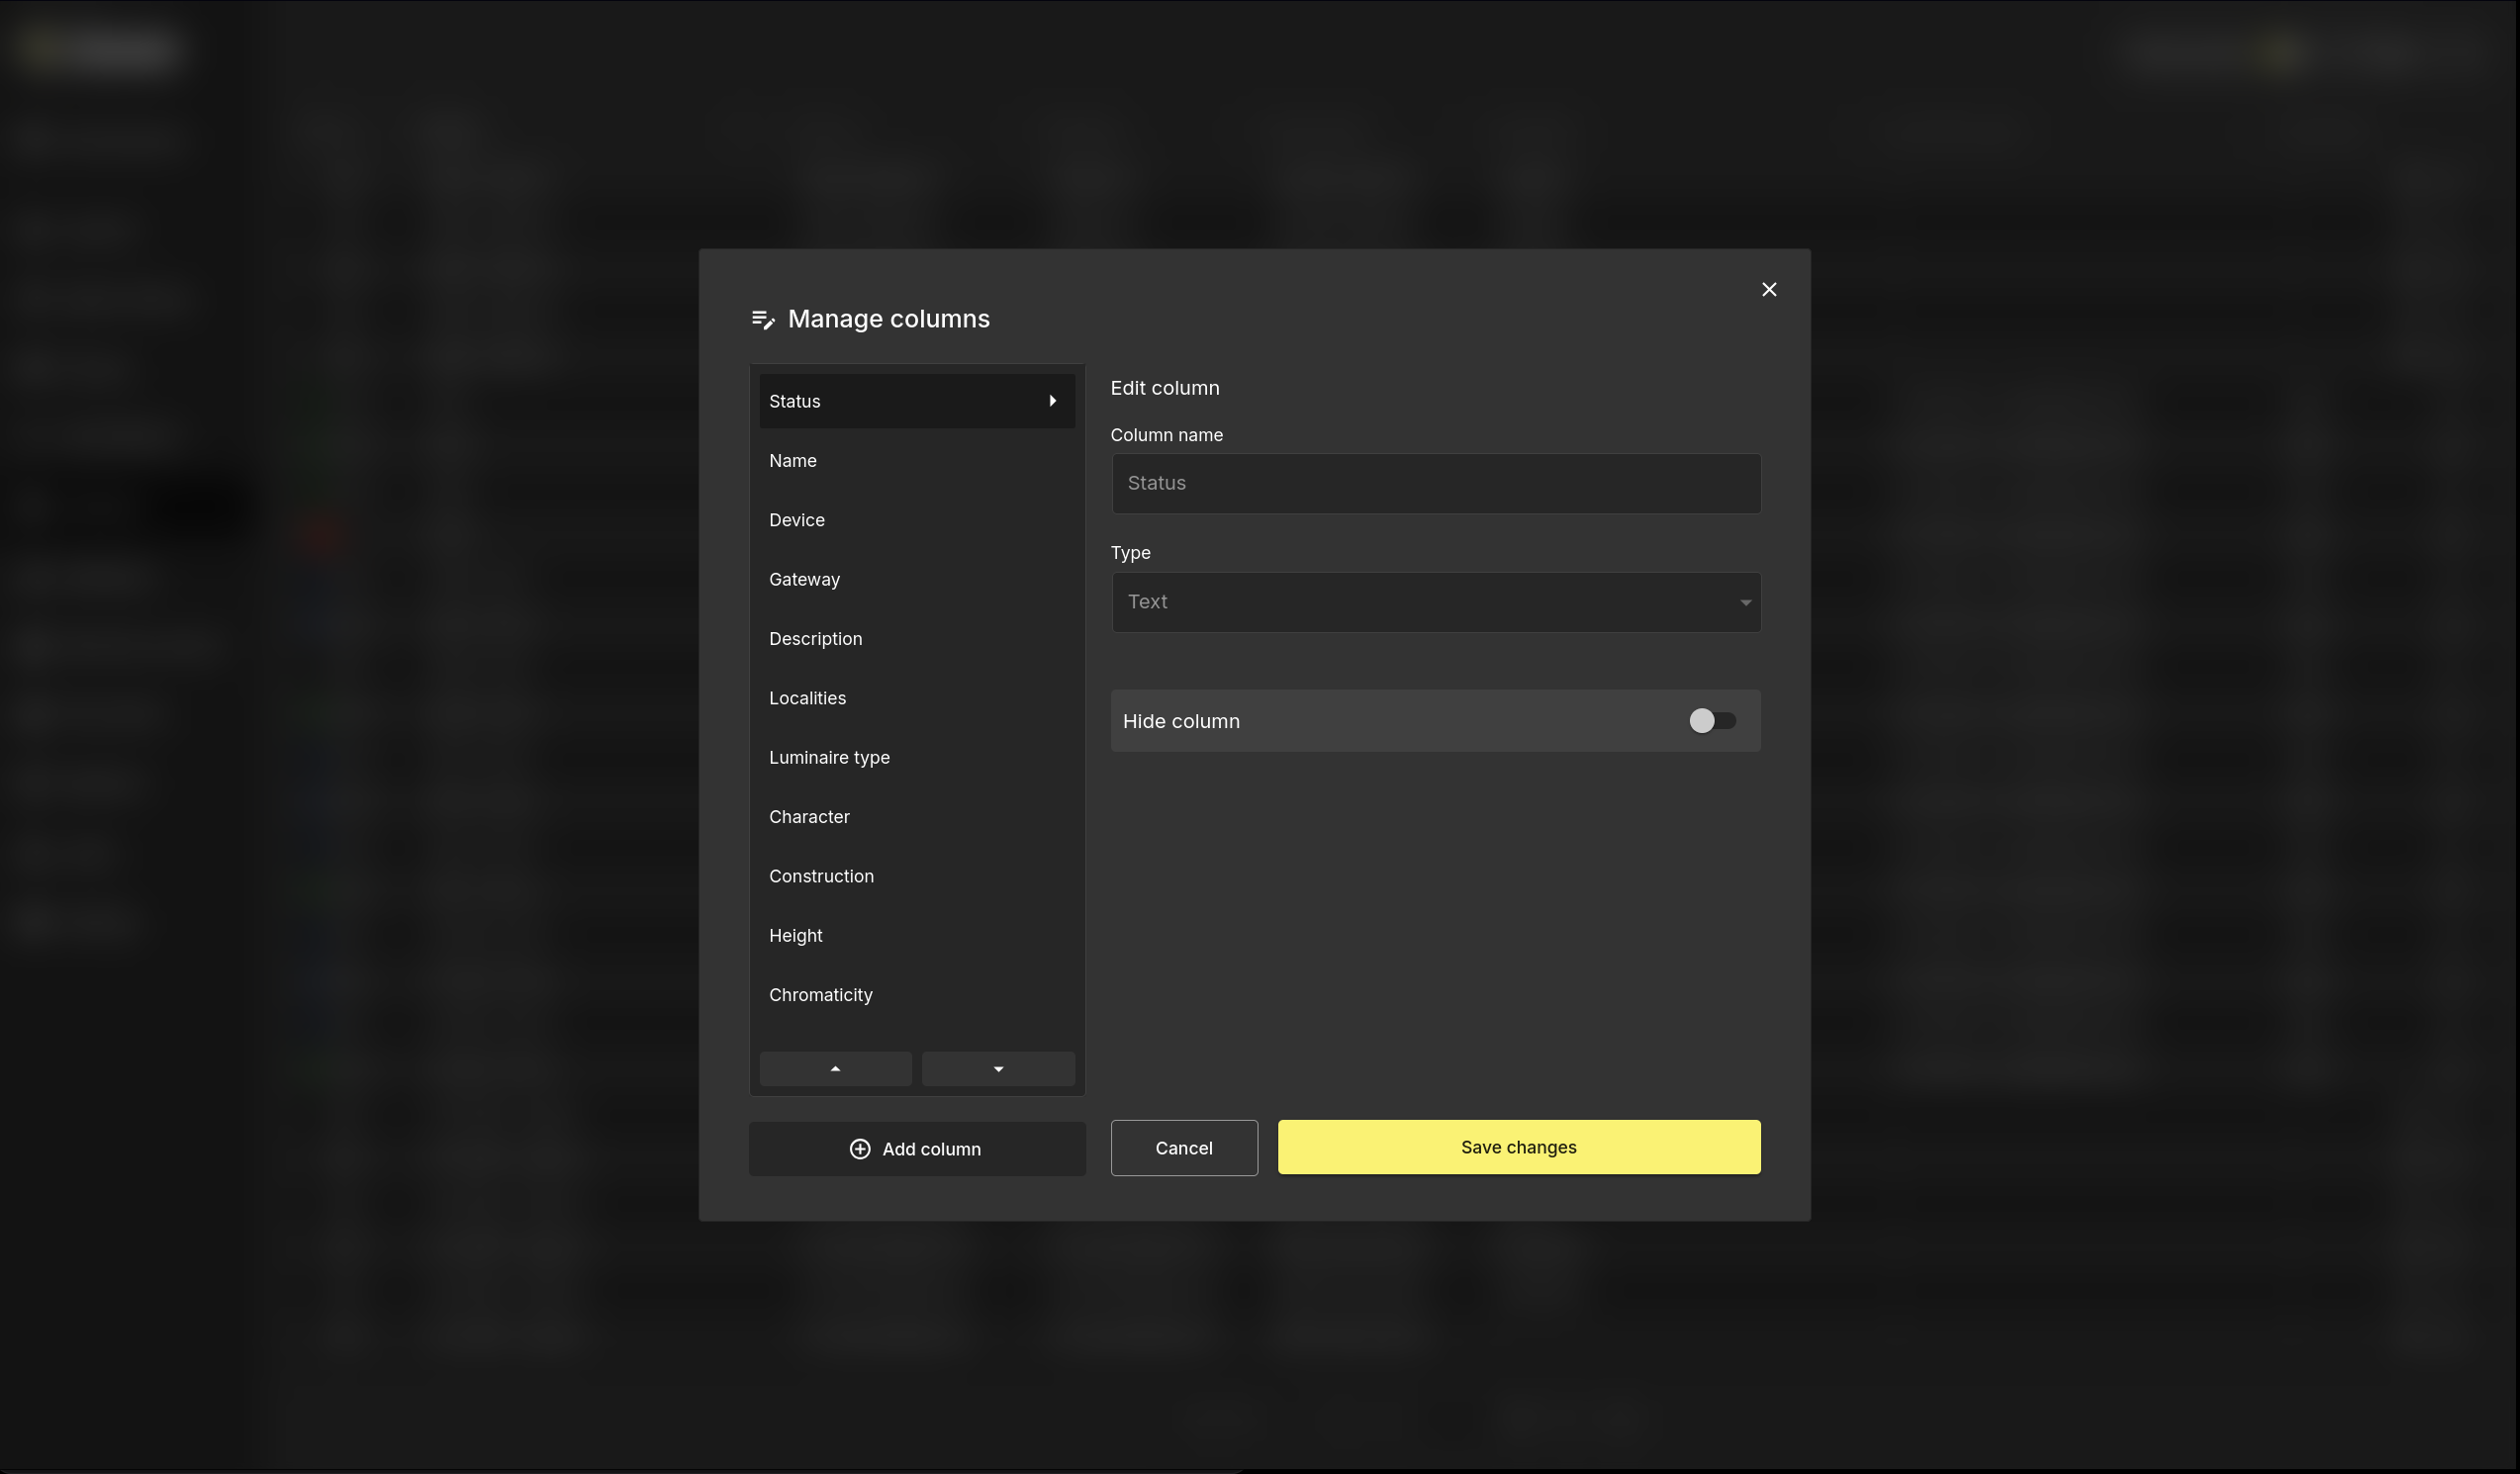
Manage Columns
Opens a window for managing the table's column layout. Here you can:
- Add new custom columns.
- Rename existing columns.
- Reorder columns by dragging.
- Toggle individual column visibility.
Sync Settings
Broadcasts the current Fade Time setting to all devices in the network. Use this after replacing a faulty device to restore its Fade Time configuration without accessing each device individually.
Input Module Action Editor
Input Module devices have an additional settings (gear) icon in their row. Clicking it opens an action editor that defines what happens when the input module receives a signal.
Input Device Type
| Type | Description |
|---|---|
| Impulse | For momentary inputs such as push buttons that return to their default position after being pressed. Only one action block is available. |
| State | For bistable inputs such as on/off switches. Separate action blocks are available for the ON and OFF positions. |
| PIR | For motion sensors. Provides two action blocks like State, and additionally allows setting a switching time and polarity. Use the polarity option for alarm-type PIR sensors that are active by default and switch off on motion, as opposed to standard PIR sensors that switch on. |
Condition
An optional condition that restricts when the action block executes:
| Condition | Description |
|---|---|
| Time | Restricts execution to a defined time window. |
| Lux Range | Executes only when the lux reading of a control group is within a set range. |
| Select Automation On | Executes only if a specified automation in a group is active or inactive. |
| Any Automation On | Executes only if any automation in a group is currently active. |
| No Automation On | Executes only if no automation in a group is currently active. |
Action Block
Each action block contains one or more actions executed in response to the input signal. Available action types:
| Action | Description |
|---|---|
| Control Group | Sets a group to a specific output level (in steps of 10%) or to ON/OFF. |
| Automation | Turns a specified automation on or off for a group. |
| Override | Overrides all automations on a group for a set duration. |
Actions can be given a delay relative to the previous action:
Example
- All actions with delay off → all actions execute simultaneously.
- Fourth action has delay on, set to
00:00:00→ it executes immediately after the first three complete. - Fourth action has delay on, set to
00:00:05→ it executes 5 seconds after the first three complete. - All actions have delay on, set to
00:00:00→ actions execute one after another in sequence.
Warning
When an action turns off an automation and then controls a device in that group, the device control action must be set as a second step with delay enabled (even at 00:00:00). If both actions run simultaneously, the system may try to control the device at the same time the automation is being disabled, causing unexpected results.